

Search, Filter, Edit & Remove Staff Members
This guide covers everything you need to know about managing existing team members, handling pending invitations, adjusting roles, suspending access, and permanently removing members from your WaanKit workspace.
1. Search, Filter & Sort Staff Members
1.1 Keyword Search
- In the search box, enter the staff member's name.
- Click "Search" or press
Enter. - The table will filter in real time, displaying an active search tag such as
Search : John.
1.2 Filter by Admin Rights
- Click the "Admin Rights" filter button above the table.
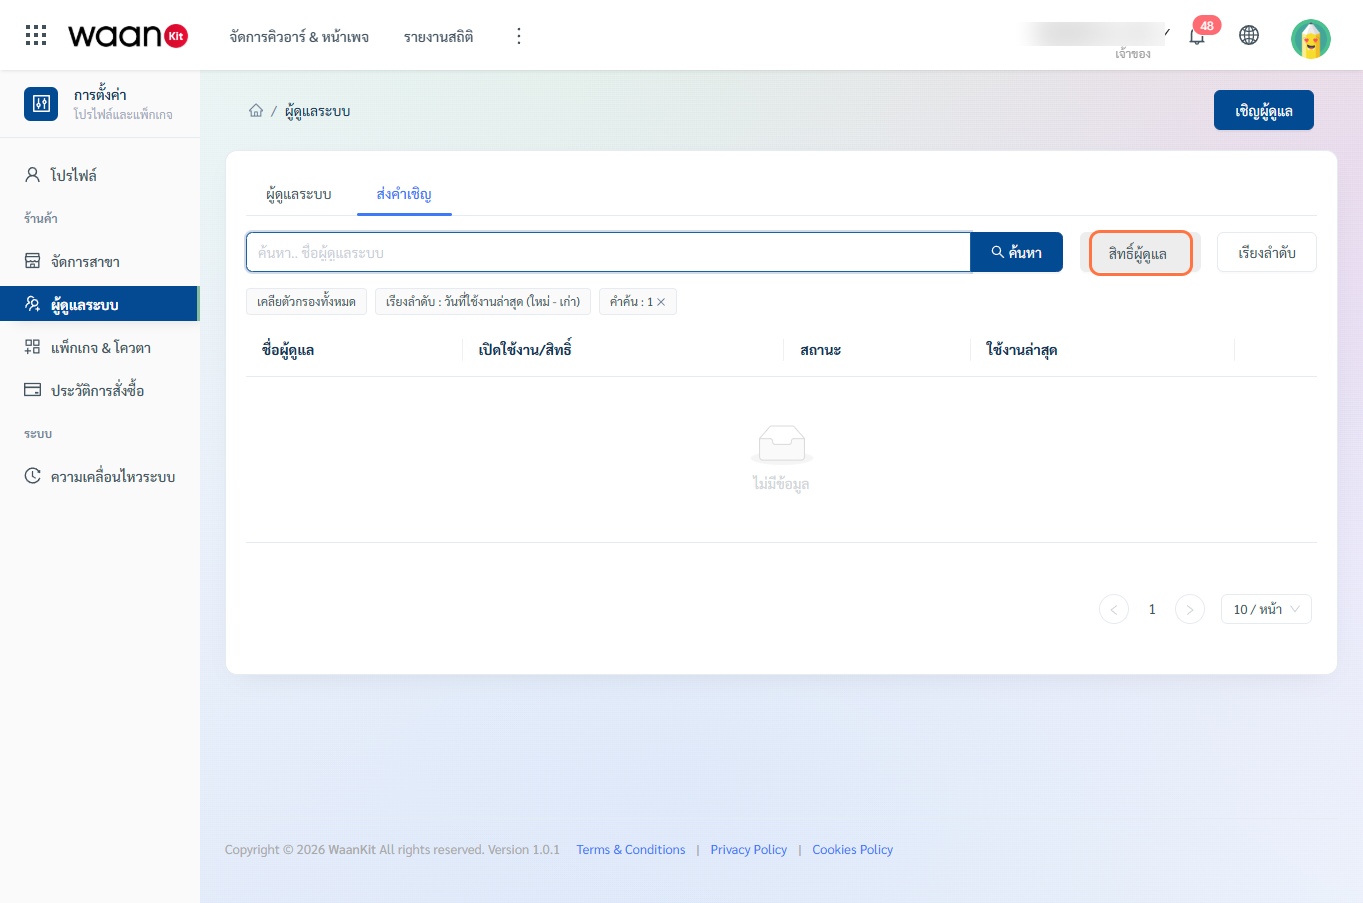
- Select the roles you want to view:
- Owner
- Manager
- Data Analyst
- Click the bottom "Search" button to apply the filter.
1.3 Sort Order
Click the "Sort" dropdown button to change ordering:
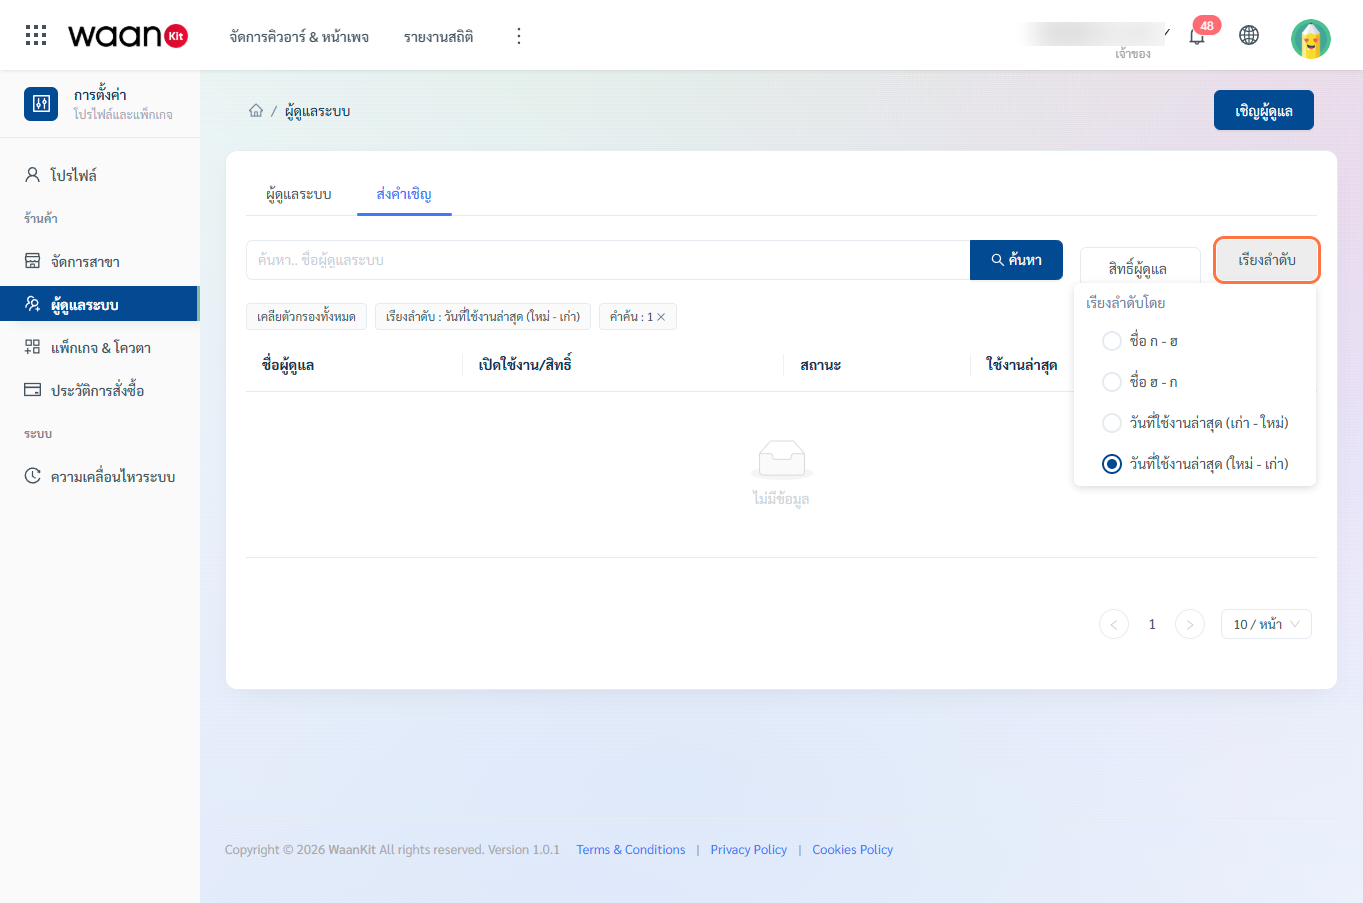
- Name A - Z / Name Z - A: Alphabetical sorting.
- Last Active (Newest First): (Default) Most recently active team members appear at the top.
- Last Active (Oldest First): Shows inactive members first.
2. View Profiles, Adjust Roles & Toggle Suspension
To inspect details or modify an active team member:
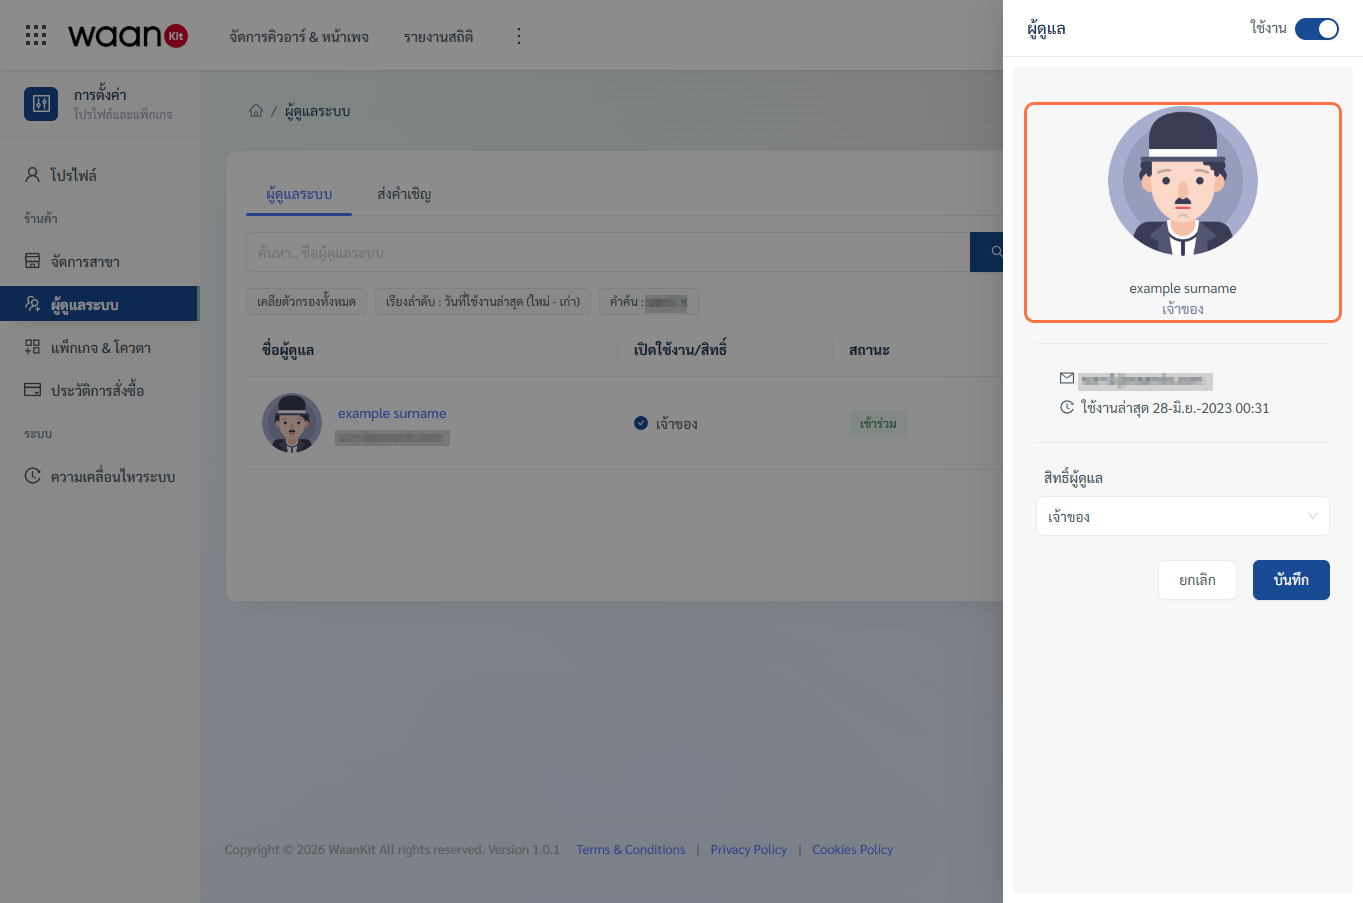
2.1 Open Member Profile (View Staff Drawer)
- In the "Admin Staff" tab, click on the member's name in the table.
- A 360px side drawer opens, showing the avatar, full name, email, last active timestamp, and account status.
2.2 Toggle Account Status (Enable / Suspend)
- Located at the top right of the drawer:
- Enable: Active state. Member can log in and access workspace data.
- Suspend: Suspended state. Instantly revokes workspace access without deleting historical logs or data.
2.3 Modify Assigned Role
- In the "Admin Rights" dropdown, select the new role (e.g., promote from Data Analyst to Manager).
- Click "Save".
- Confirm in the Popconfirm prompt ("Confirm Save Data").
- The updated role takes effect immediately.
3. Manage Pending Invitations & Resend Emails
For team members who have been invited but haven't accepted yet:
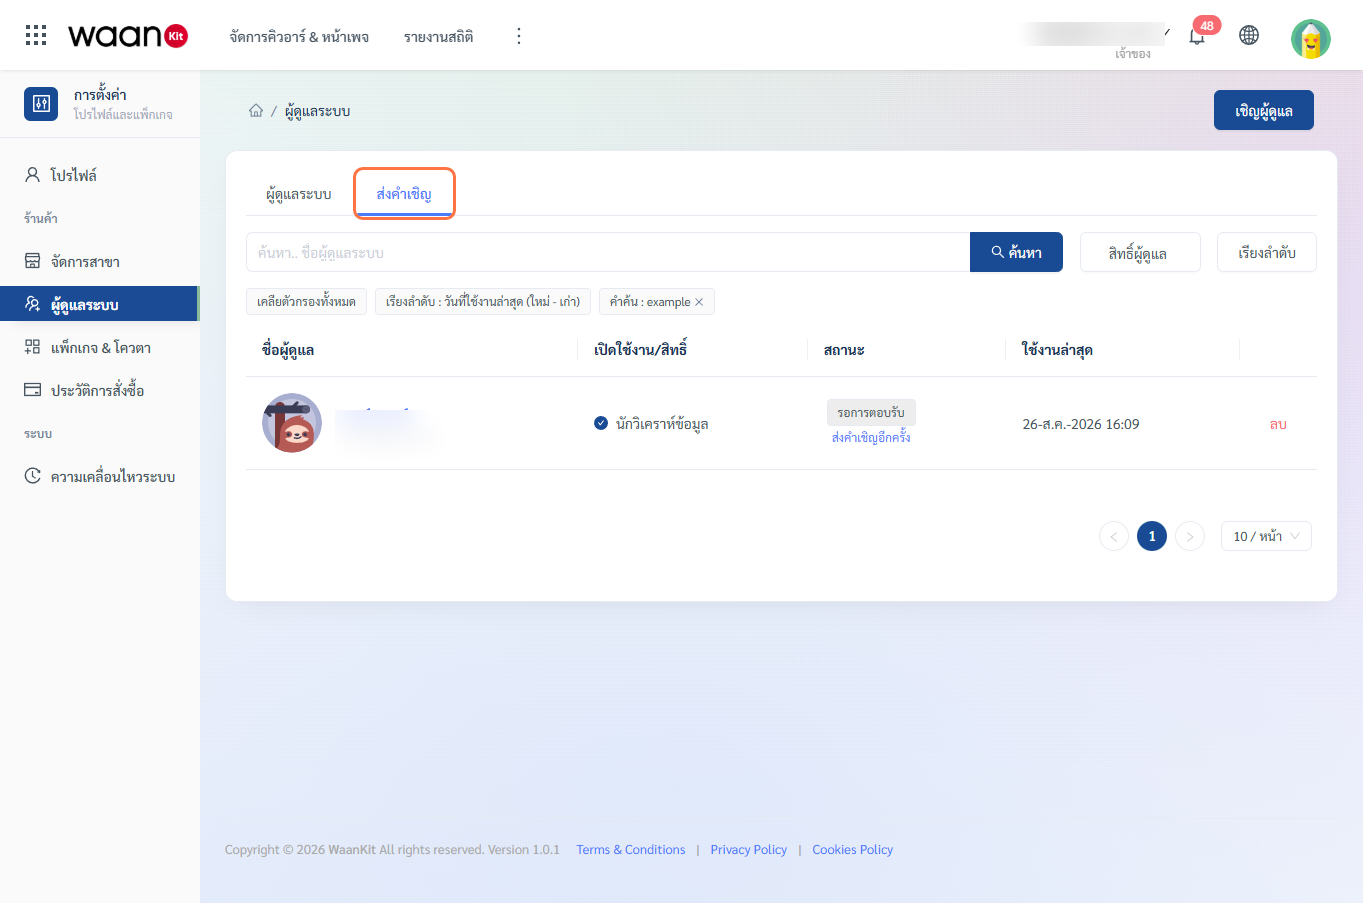
- Switch to the "Invitations" tab.
- View all pending recipients marked with
"Waiting for a response". - Resend Invitation:
- Click the blue link "Resend Invitation" below the status tag.
- Confirm in the Popconfirm to trigger a new invitation email.
- Cancel Invitation:
- Click the red "Delete" link on the right side of the row.
- Confirm deletion to revoke the invite and restore the seat quota.
4. Remove Staff from Workspace
When an employee leaves the company or needs to be permanently removed:
Option A: Remove via Table Row
- In the row of the member you want to remove (non-Owner), click the red "Delete" link on the far right.
- In the Popconfirm warning prompt, click "OK".
Option B: Remove via Profile Drawer
- Click the member's name to open the profile drawer.
- Scroll to the bottom and click the red "Remove Staff Member" link.
- Confirm in the Popconfirm to permanently remove the member from the workspace.
[!WARNING] Owner Protection: The workspace Owner cannot be deleted or suspended. This guarantees that the organization always retains an administrative authority.