

Adding a New Branch (Step-by-Step)
This guide walks you through registering a new store branch or service location in WaanKit CRM using the Add Branch side drawer.
Prerequisites
Before creating a branch, have the following information ready:
- Branch Name: Official name (up to 255 characters).
- Branch Code: Unique numeric code (1–5 digits, e.g.,
00001,00102). - Province: The province where the branch is located.
Step-by-Step Instructions
Step 1: Navigate to Branch Management
- Log in to the WaanKit Console.
- Select the target Workspace/Store to manage.
- In the left navigation menu, go to "Settings" > "Branch Management".
- You will arrive at the
/app/setting-shop/branch/branch-listpage.
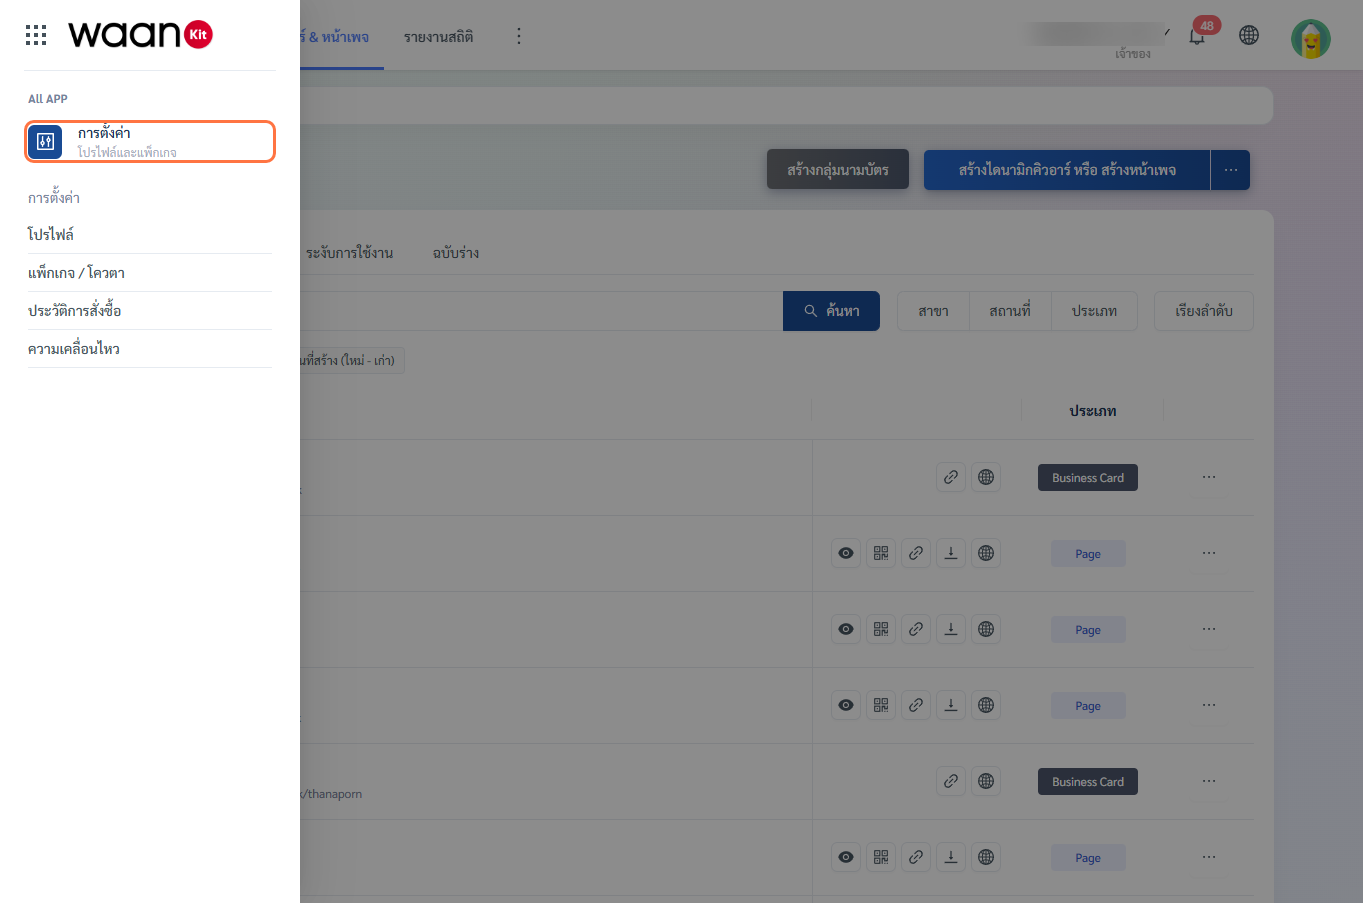
Step 2: Open the Add Branch Drawer
Click the blue "+ Add Branch" button in the top-right corner. A 640px side drawer will slide in from the right.
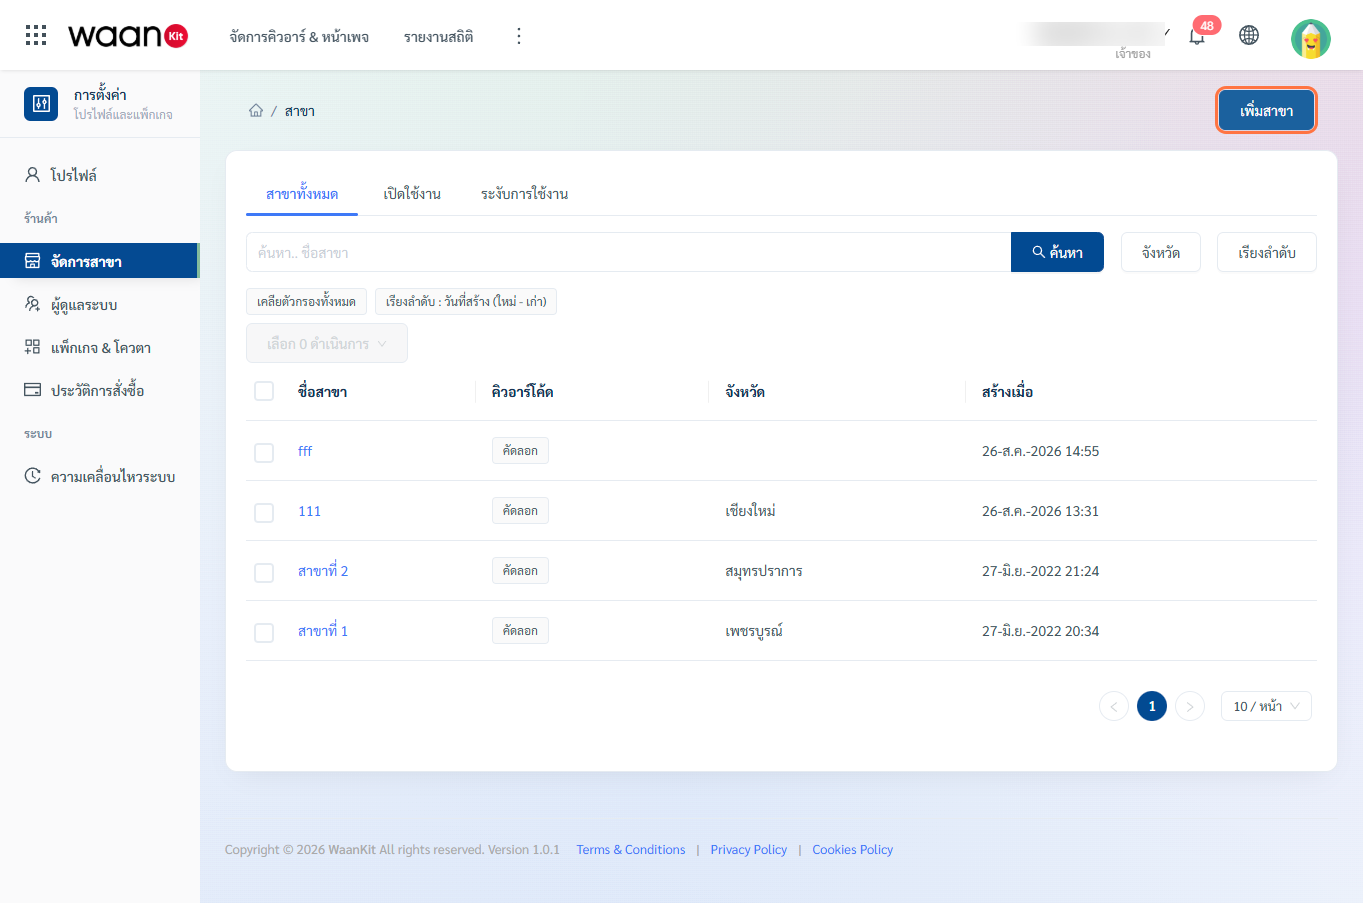
Step 3: Complete the Form Fields
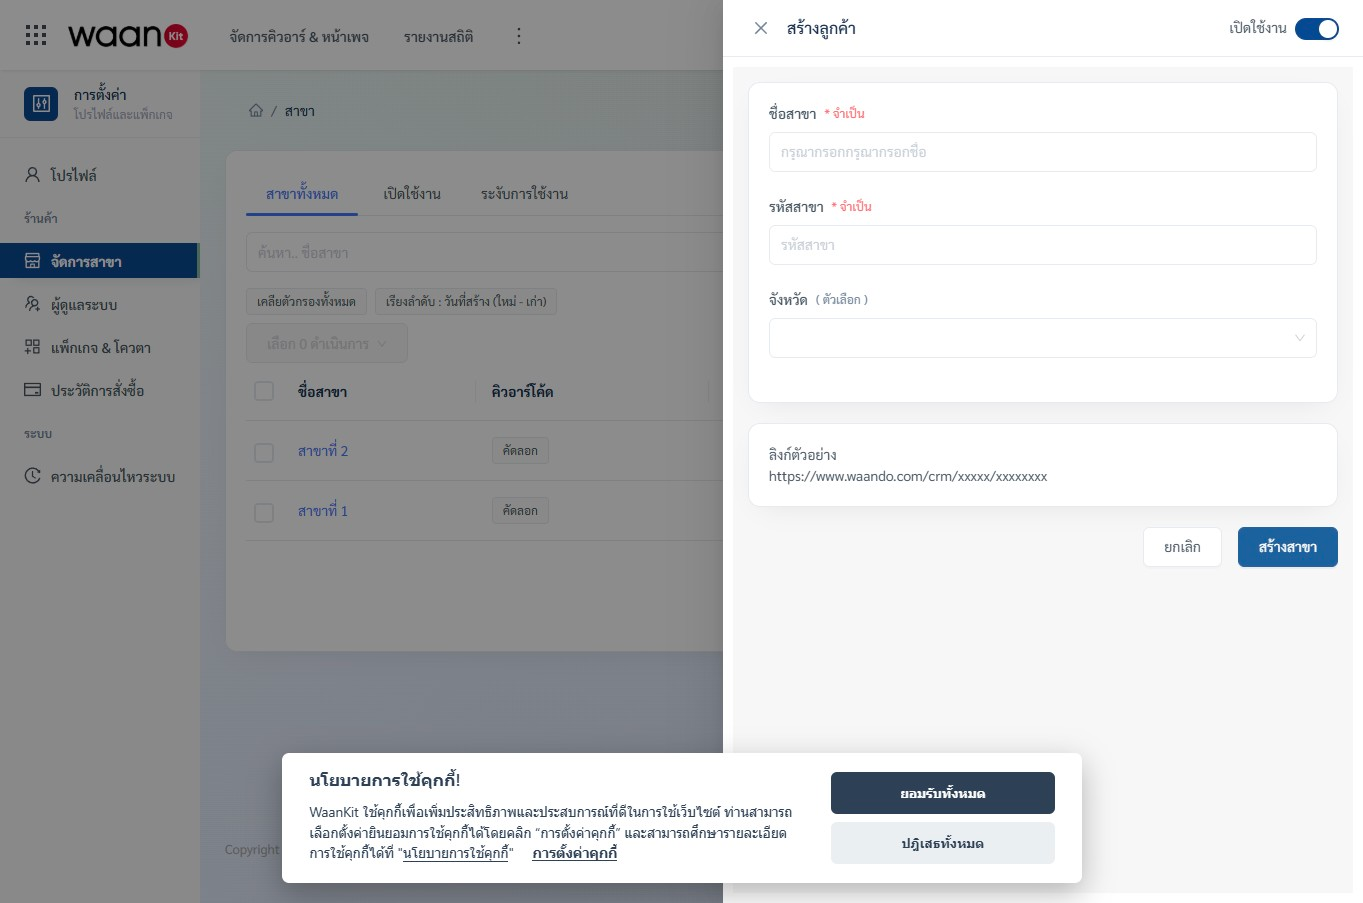
- Branch Status Toggle: Located in the drawer header. Switch to Enable (Blue/Green) for active branches or Suspend (Gray) for draft/pending branches.
- Branch Name: (Required) Enter the full location name (e.g., "Siam Paragon 4th Fl.", "Chiang Mai Nimman").
- Branch Code: (Optional) Enter a 1 to 5 digit numeric code (e.g.,
101,00045). - Province: (Optional) Select the corresponding province from the searchable 77-province dropdown list.
Step 4: Save & Confirm
- Click the "Save" button at the bottom of the drawer.
- Upon success:
- The drawer closes automatically.
- A green notification toast appears: "Saved successfully".
- The newly created branch is immediately visible in the top row of the table.
System Notes & Constraints
[!IMPORTANT] Branch Code Constraints: Branch codes support up to 5 numeric digits without special characters. If omitted, the field remains empty without affecting functionality.
Next Steps
- Learn how to search, filter, and delete branches in the Branch Search, Filter & Delete Guide.