

Digital Business Cards & vCard
The Digital Business Card Group module provides a centralized management hub for corporate electronic business card profiles. When clients or contacts scan an employee's QR Code or tap their NFC Smart Card, a responsive digital card profile opens on their smartphone with a direct "Save to Contact" button that imports the employee's complete vCard (.vcf) profile directly into their address book.
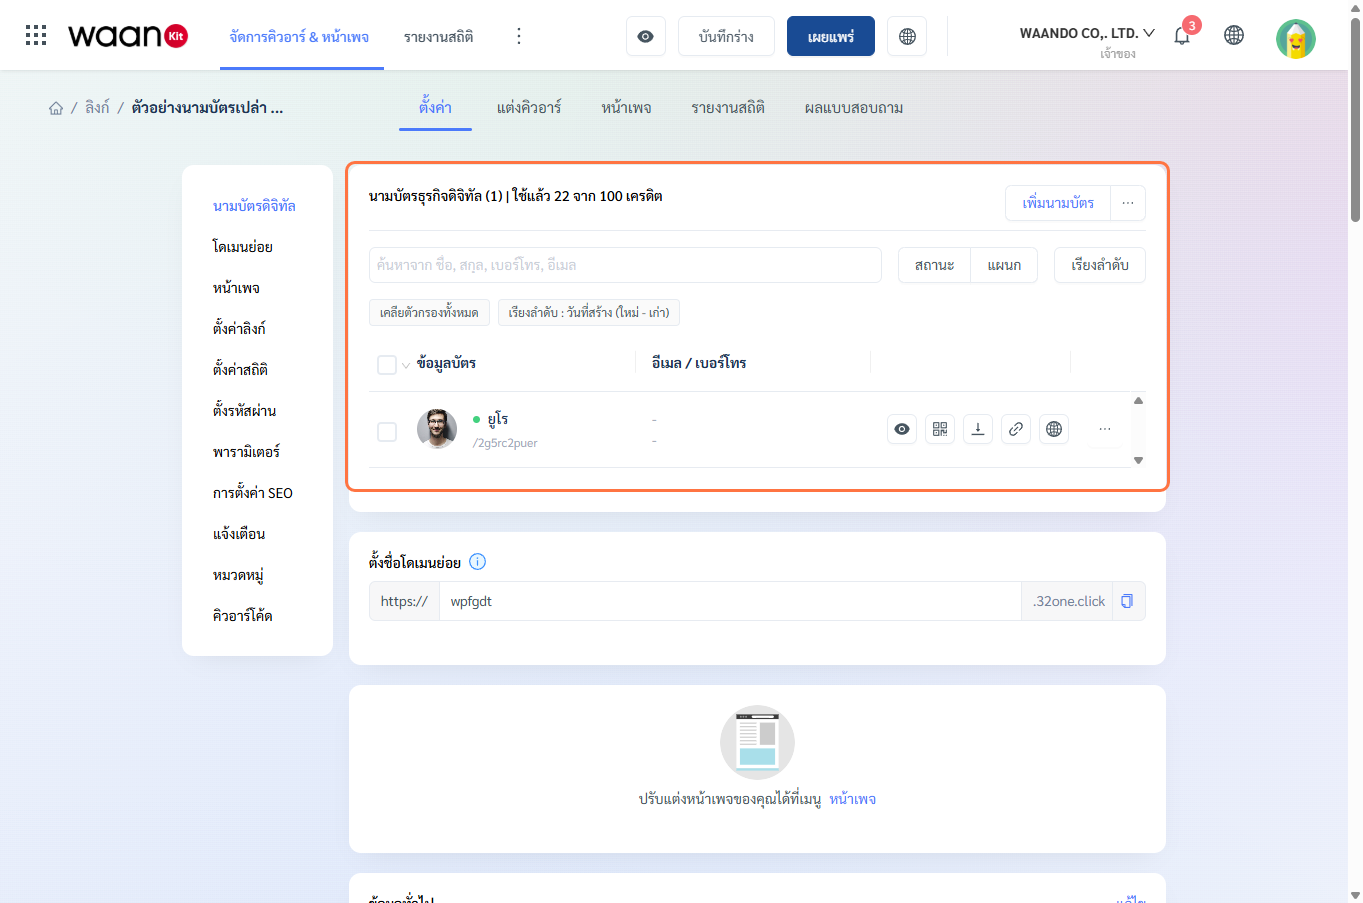
1. Creating a Business Card Group
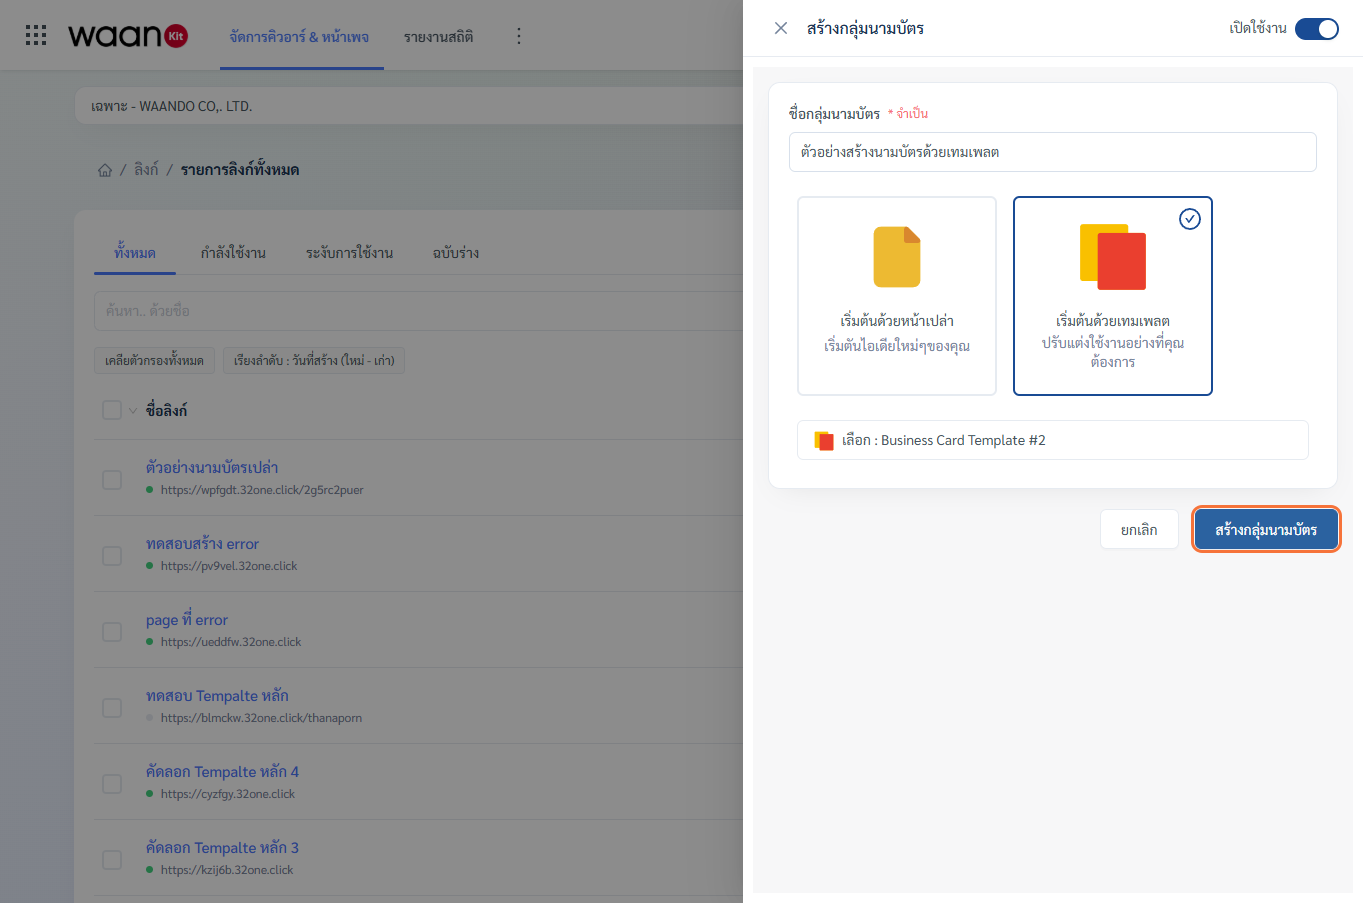
- On the all-links dashboard, click "Create Business Card Group".
- Enter your Group Name (Required), such as "Sales & Marketing Team 2026" or "Executive Leadership".
- Choose your initial creation style:
- Start with a blank page: Design the business card layout manually from scratch.
- Start with a template: Choose from pre-designed corporate business card templates.
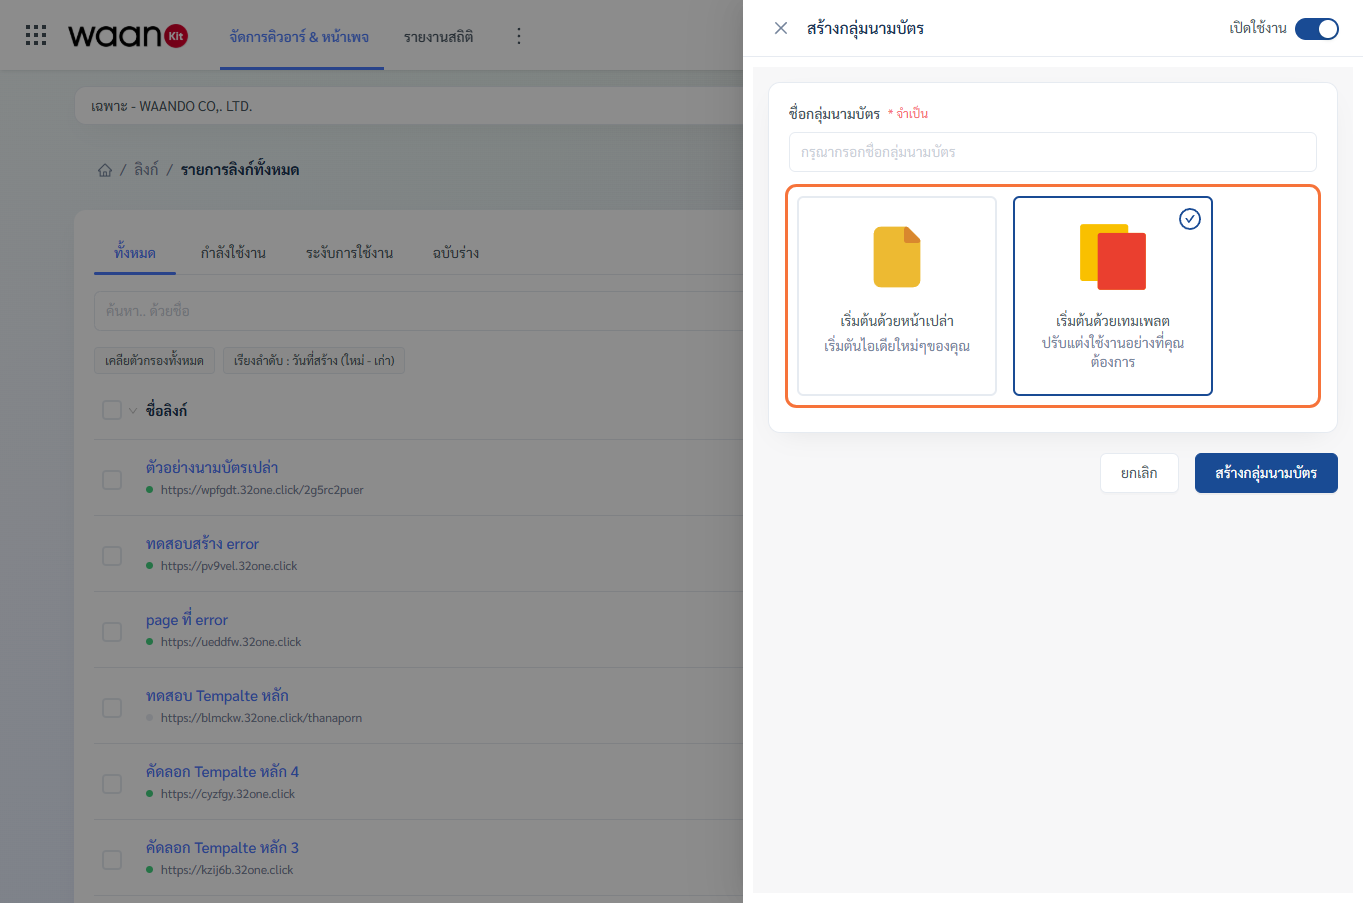
- If starting with a template, browse the template catalog:
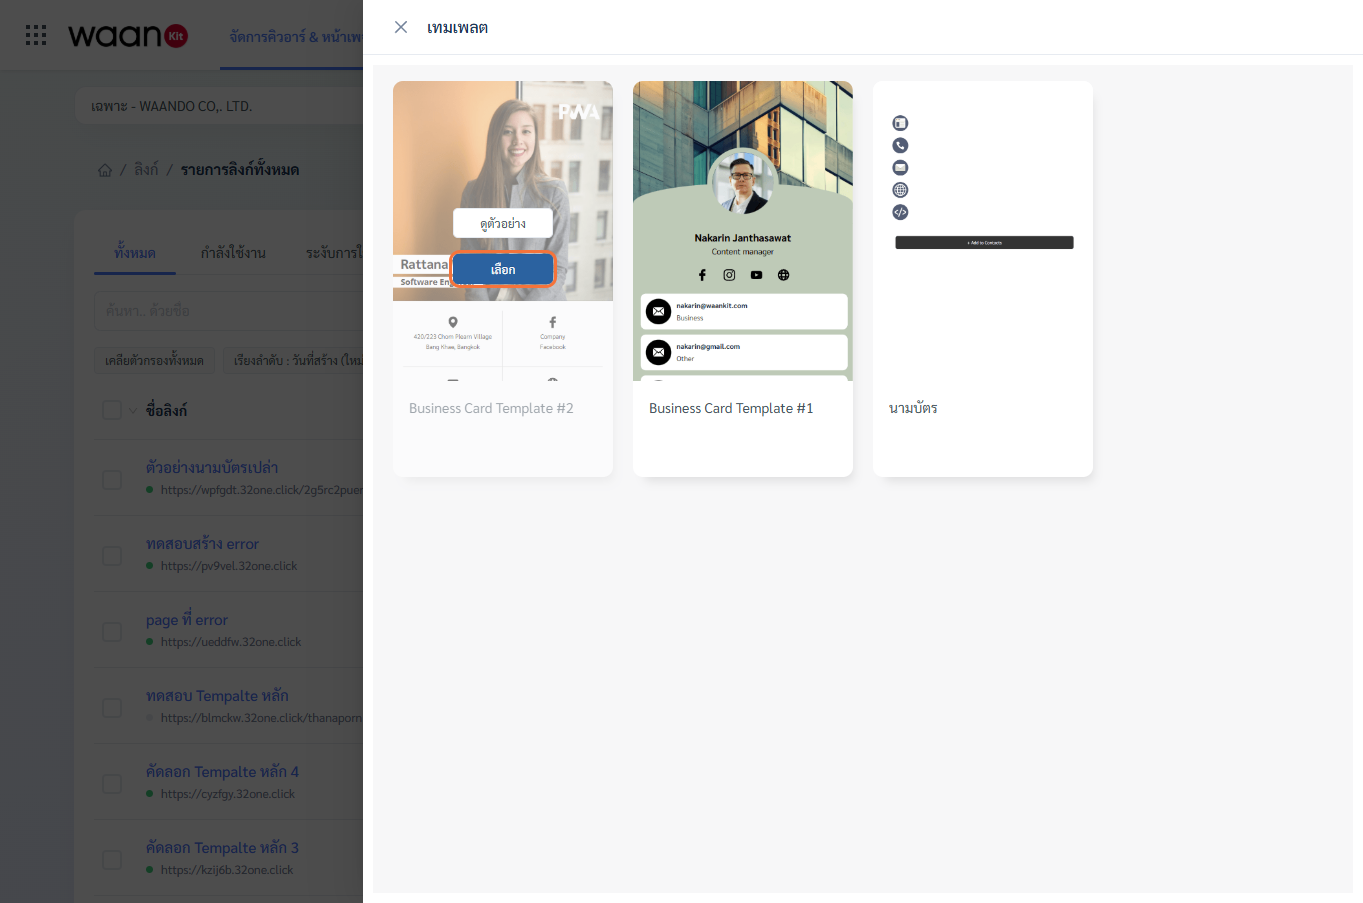
- Select the template that fits your brand identity and click "Select".
- Click "Create Business Card Group" to enter the management dashboard.
2. Digital Business Card Hub (#digital_business_card)
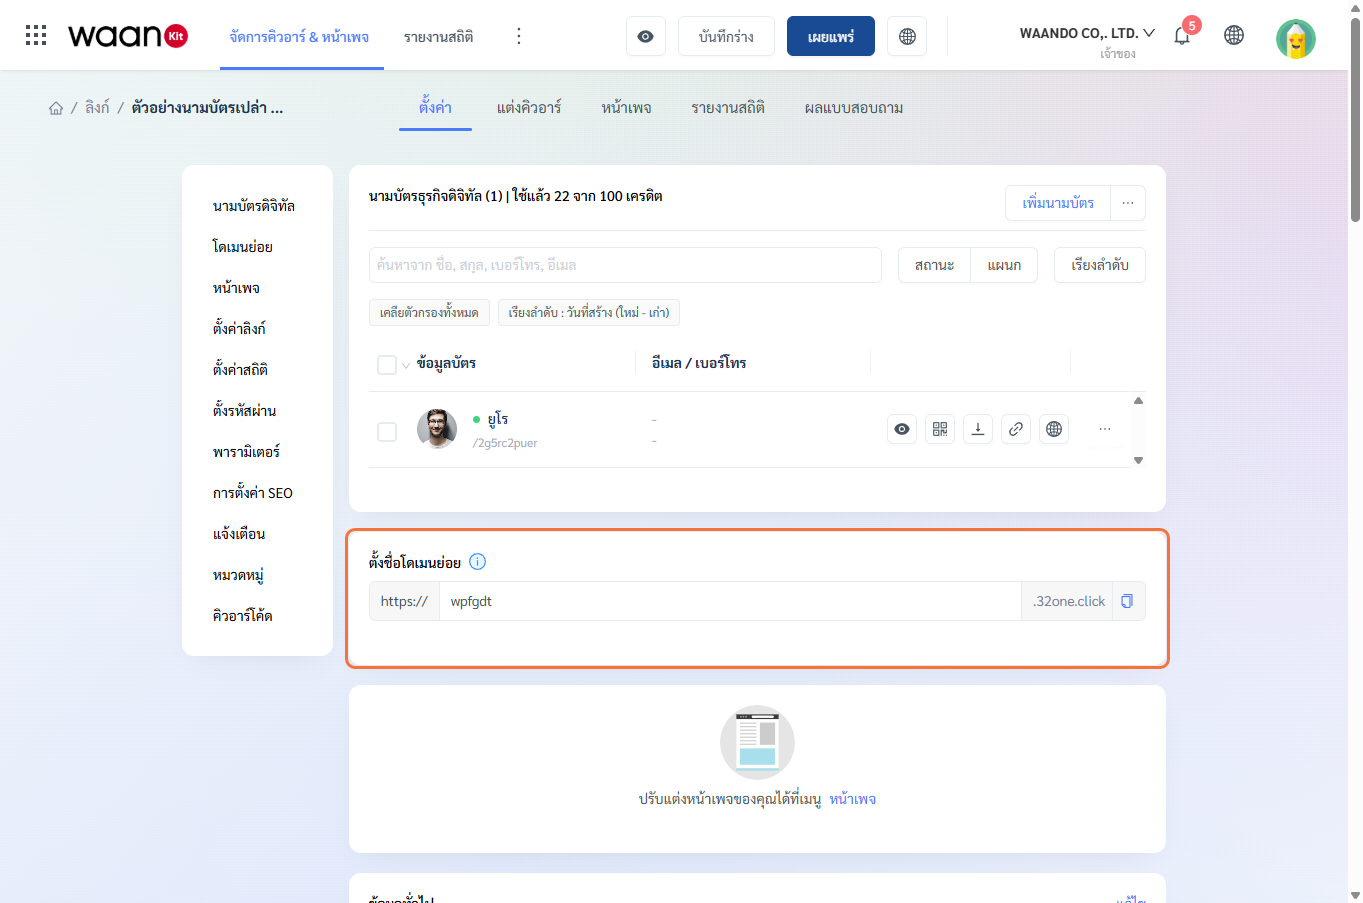
Navigating to the group details page (/app/apps/nfc/detail-nfc/[id]) presents the Digital Business Card management panel:
2.1 Quota Indicators & Toolbar Controls
- Quota Indicator: Displays current card usage against your package limits (e.g., "Used 25 of 100 Credits").
- "+ Add Business Card" Button: Opens the drawer to onboard an individual employee.
- Action Dropdown
...:- Import Cards via Excel: Bulk-onboard multiple employees using a spreadsheet file.
- Export .xlsx Data: Export the full roster of employee contact details into an Excel sheet.
- Download QR ZIP: Export print-ready QR codes for all team members in a single archive.
2.2 Adding an Individual Business Card
Click "+ Add Business Card" to open the employee onboarding drawer:
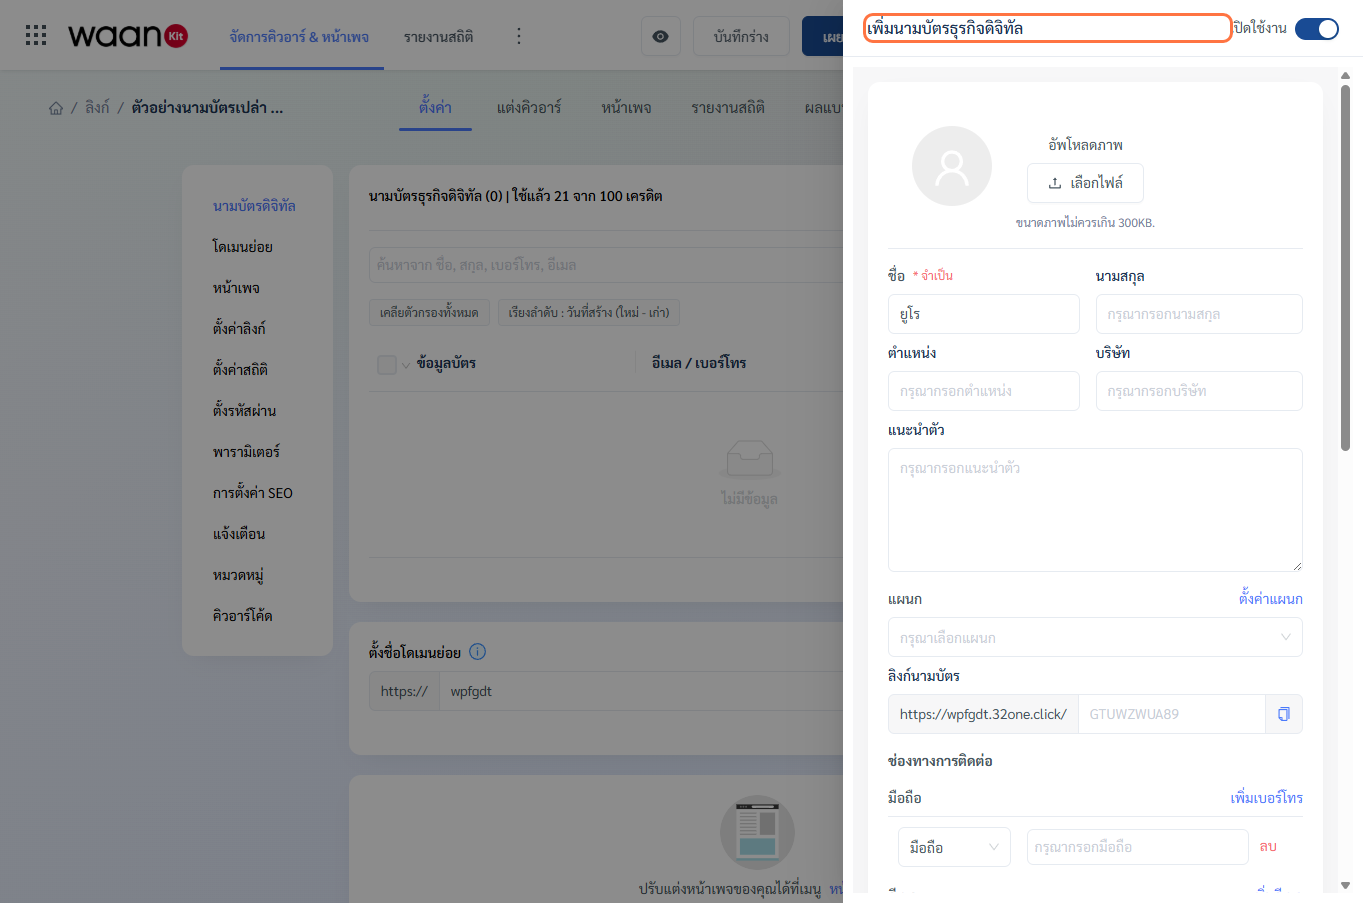
- Profile Avatar: Upload a portrait photo (up to 300KB) with built-in cropping and zoom tools.
- Personal Information:
- First Name * (Required) and Last Name
- Job Position: (e.g., Sales Manager, Senior Consultant)
- Company: Corporate organization name
- Bio (Introduce Yourself): Short introductory pitch (up to 300 characters)
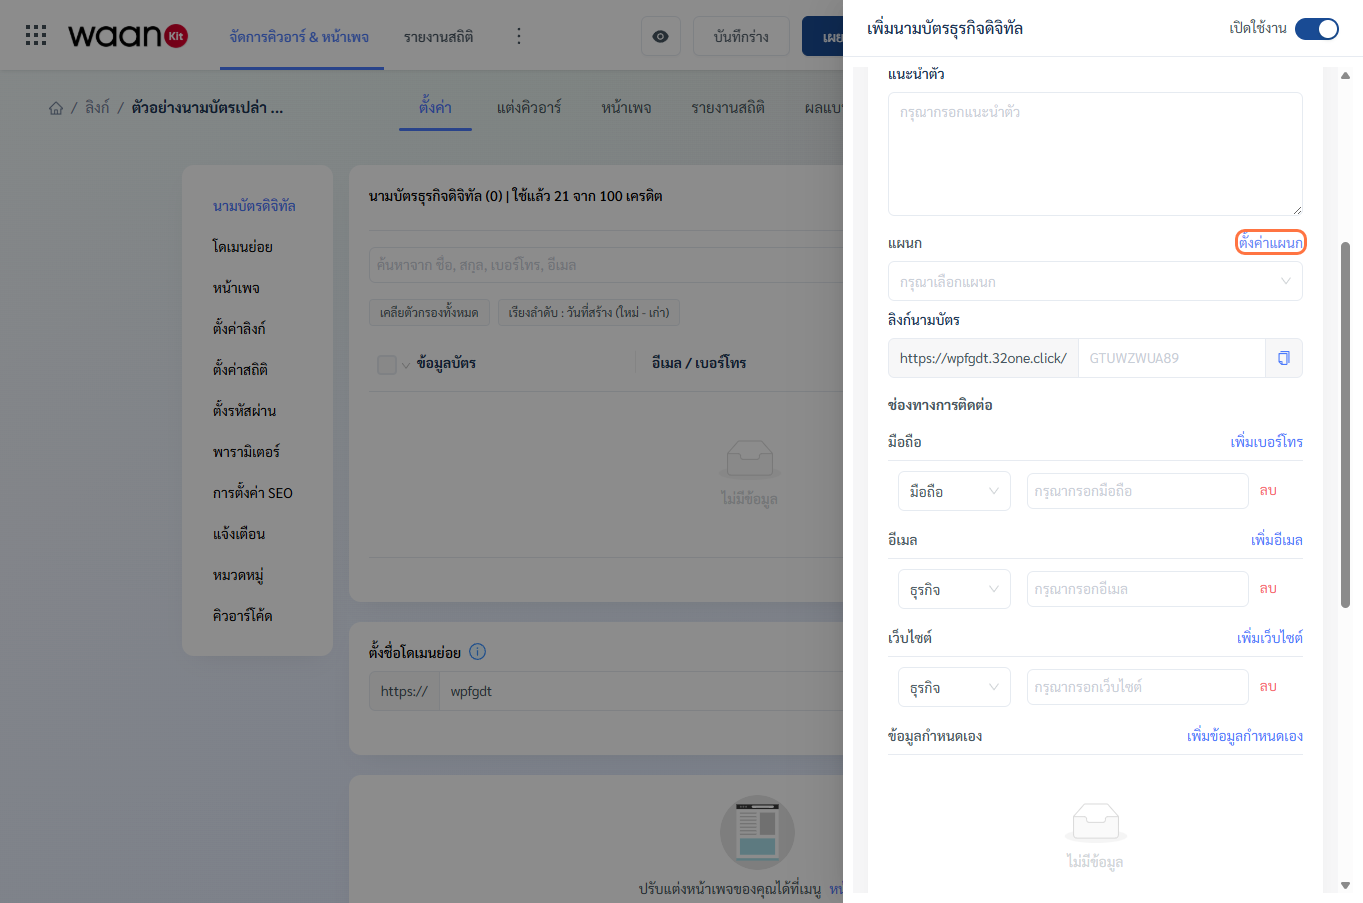
- Department: Assign to an existing department or click "Department Settings" to create a new one.
- Card URL Slug: Custom personalized URL alias for the employee.
- Contact Channels & Social Media:
- Mobile phone, work phone, email, website
- Custom social profiles: LINE ID, WhatsApp, Facebook, Instagram, LinkedIn, YouTube, TikTok, X
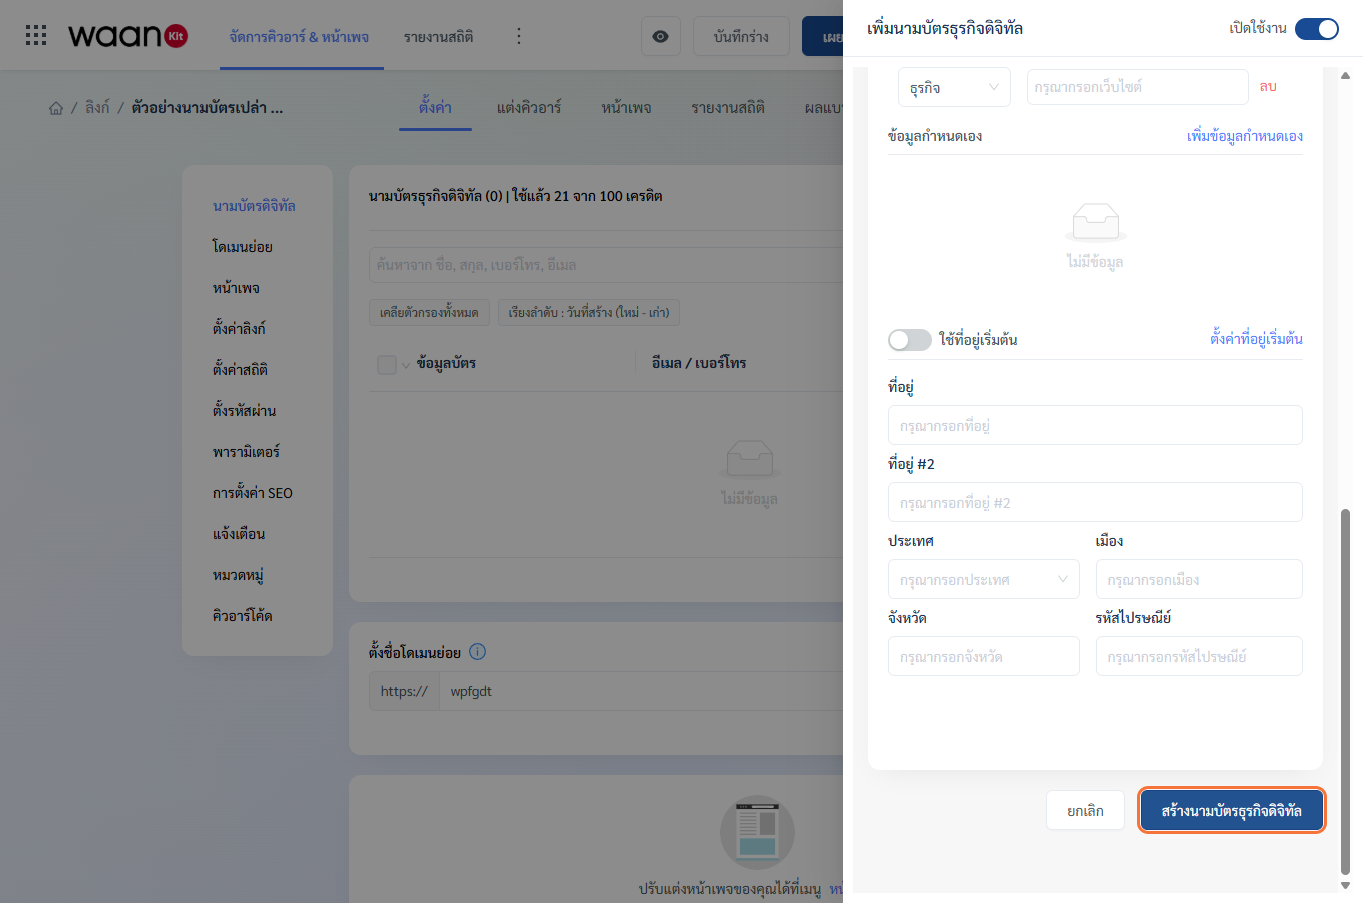
- Office Address: Use group default address or enter custom branch location coordinates.
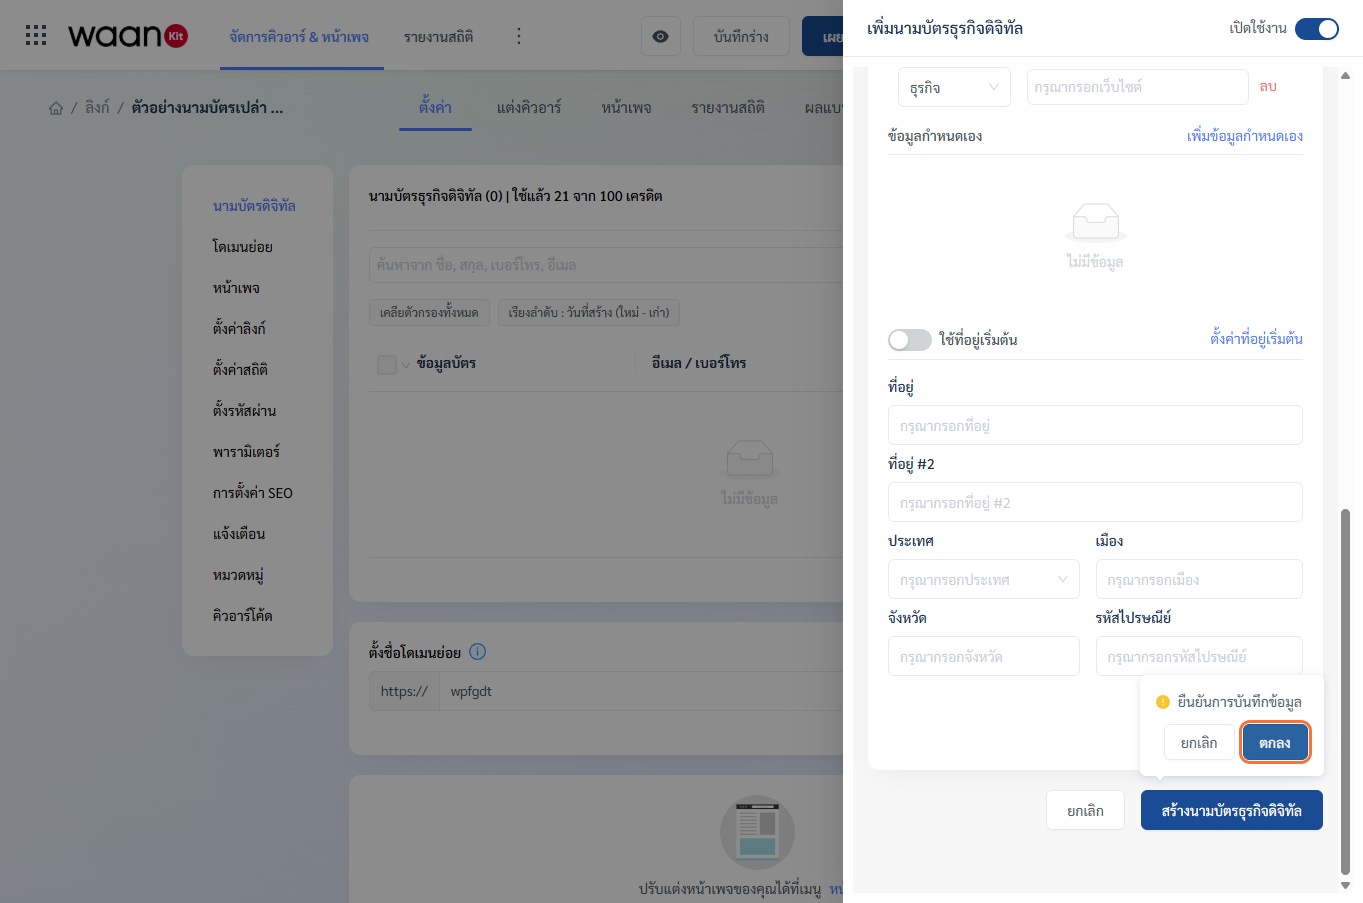
- Click "Create Digital Business Card".
- Confirm the save action in the popconfirm prompt:
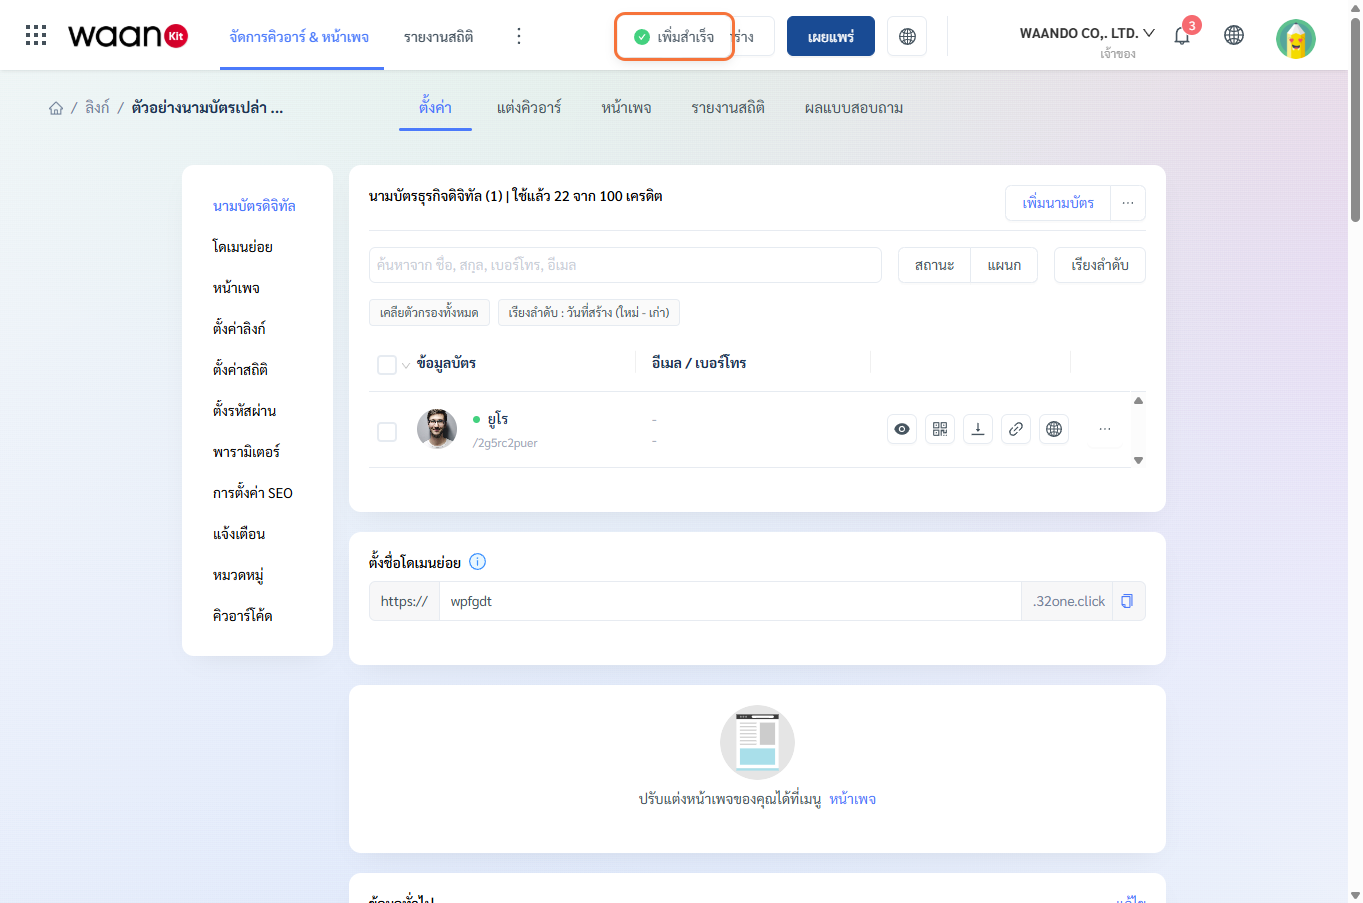
- A green toast notification "Added Successfully" confirms the new card creation:
2.3 Department Hierarchy Management
Organize your team members by department (e.g., IT, Sales, Marketing) for clean roster filtering and enterprise reporting:
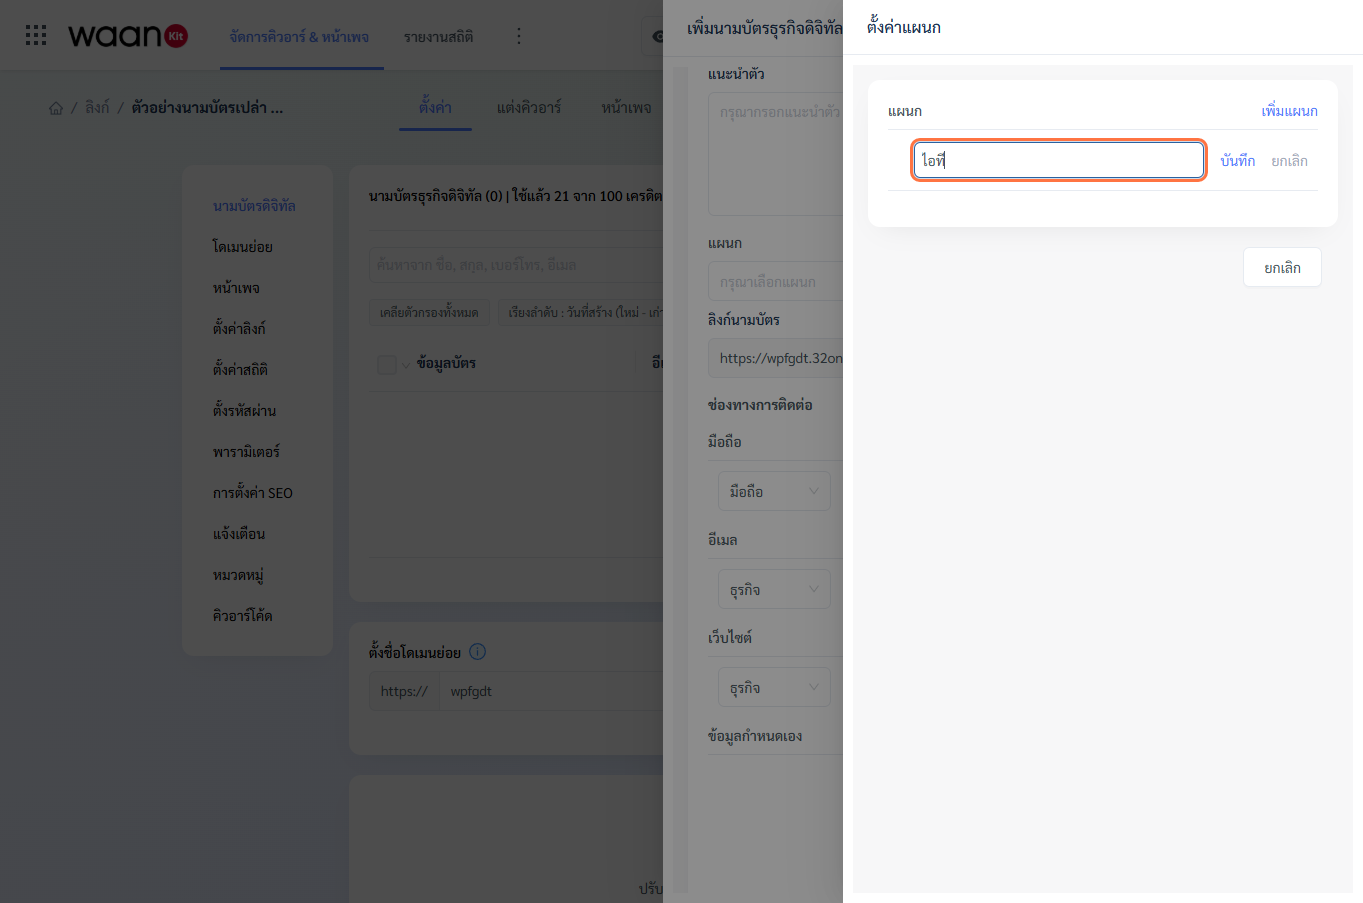
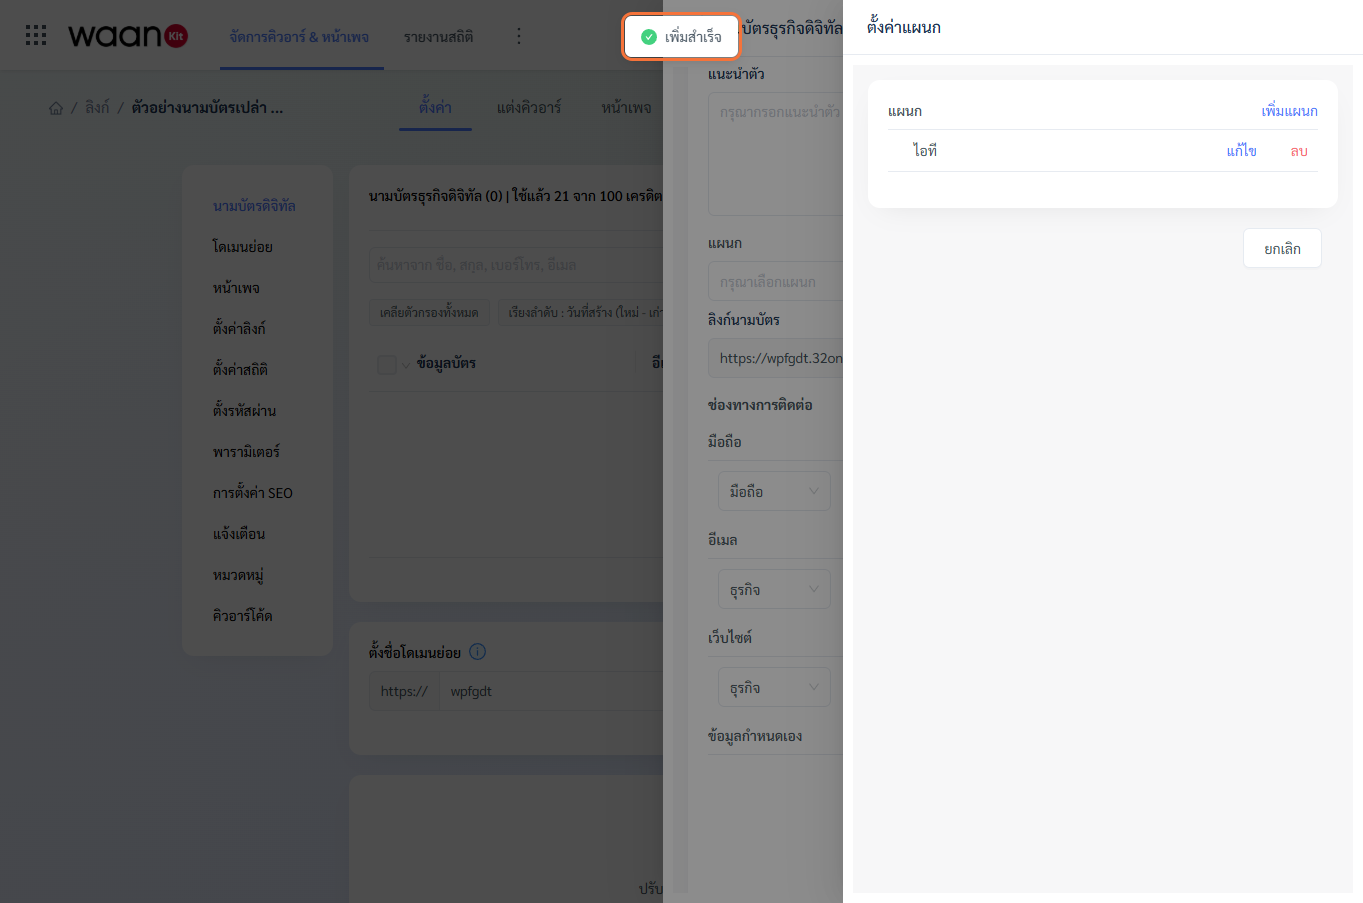
- Inside the Add/Edit Card drawer, click "Department Settings".
- Type the department name (e.g.,
IT Department,Sales) and click "Save":
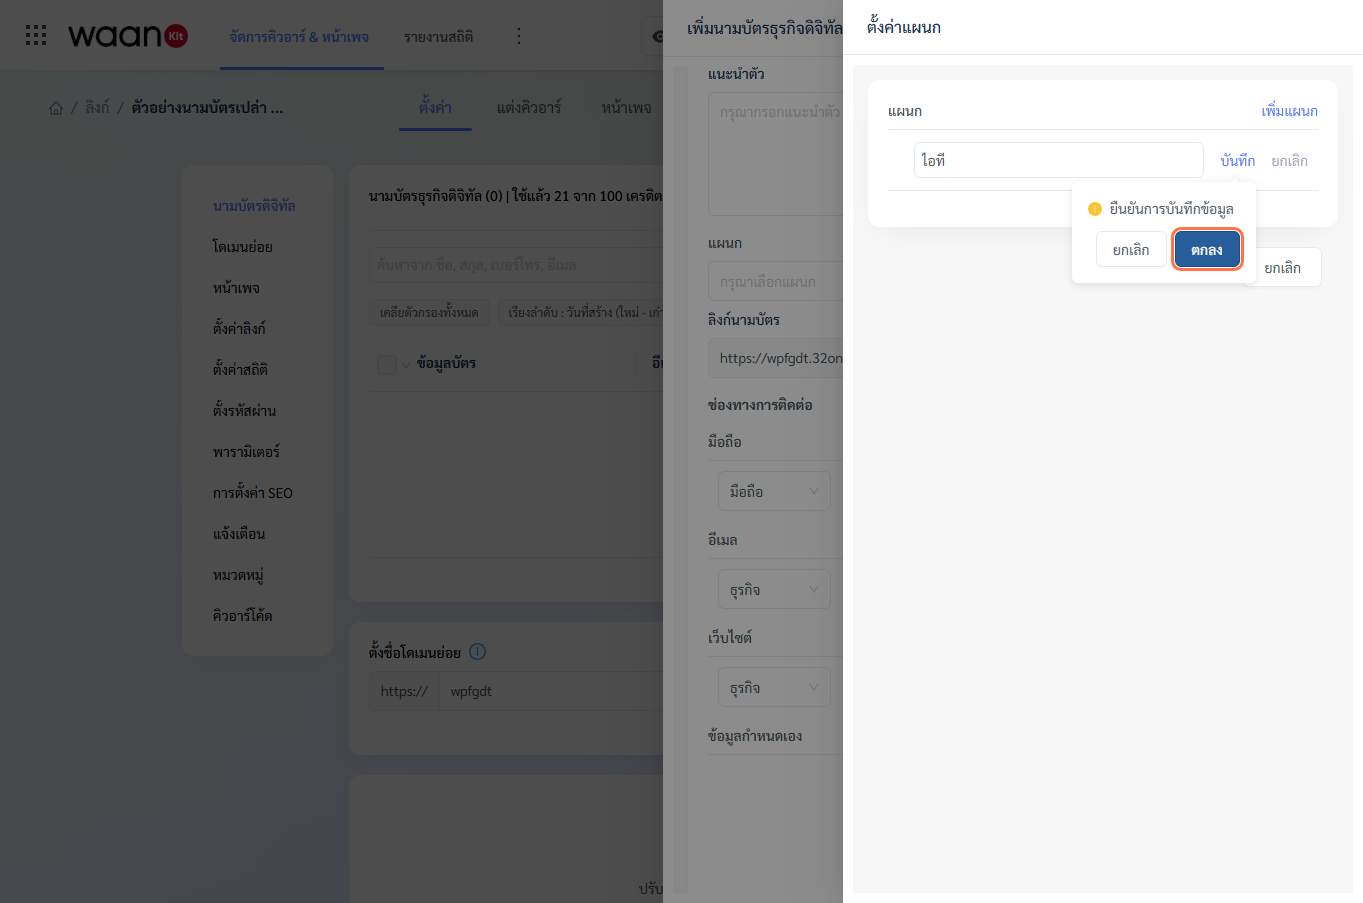
- Confirm department creation in the popconfirm:
- The department is immediately added with edit and delete capabilities:
2.4 Batch Excel Import
To onboard hundreds of employees at once:
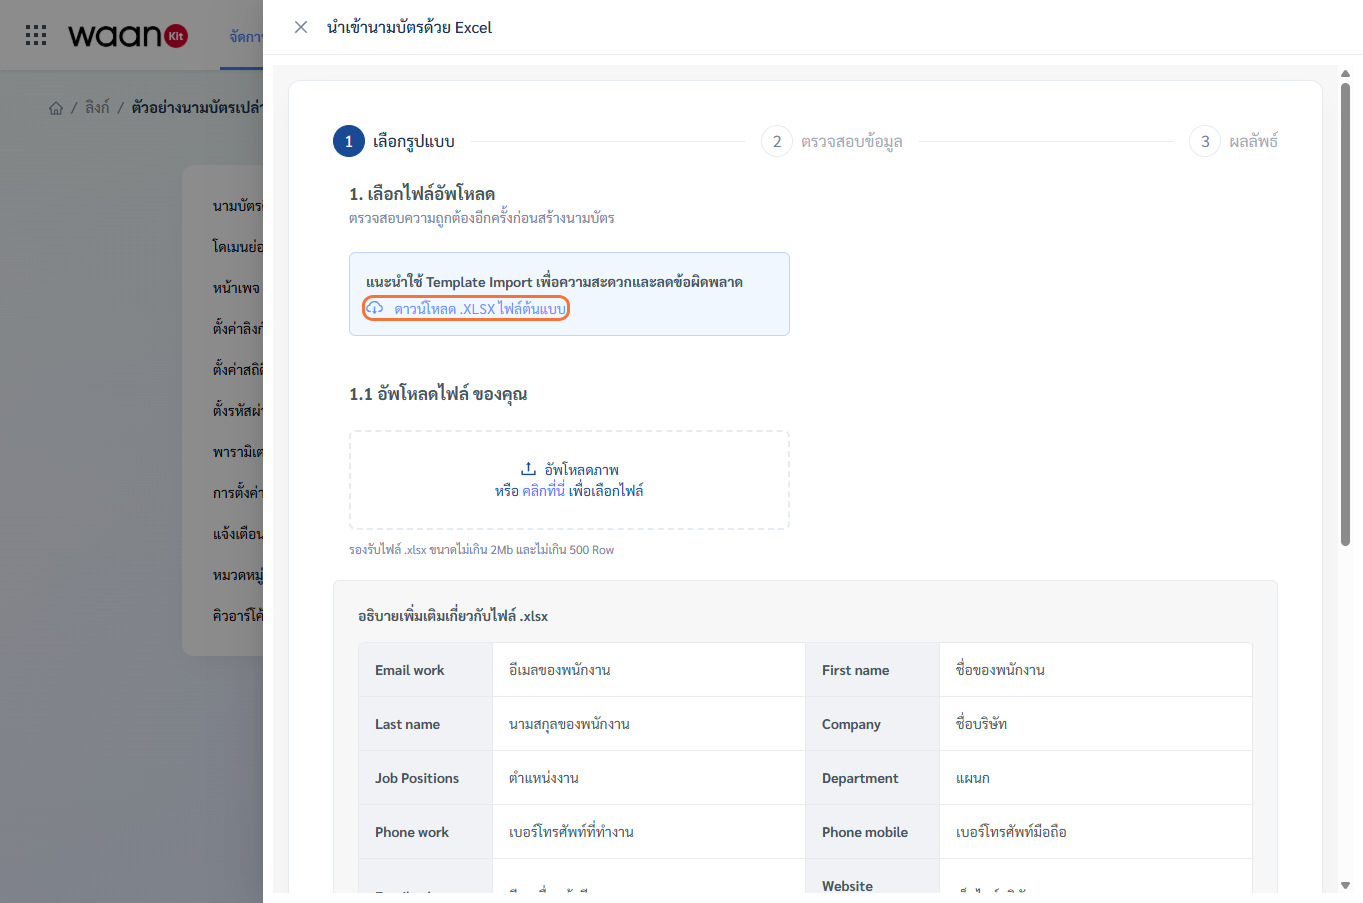
- Click the
...menu beside the Add Card button > choose "Import Cards via Excel". - Click "Download .XLSX Template" and fill in your records:
First name(Required): Employee's given nameLast name: SurnameEmail work(Required): Business email addressCompany,Job Positions,Department,Phone mobile,Phone work,Website
- Upload your
.xlsxfile (max 2MB, up to 500 rows per batch).
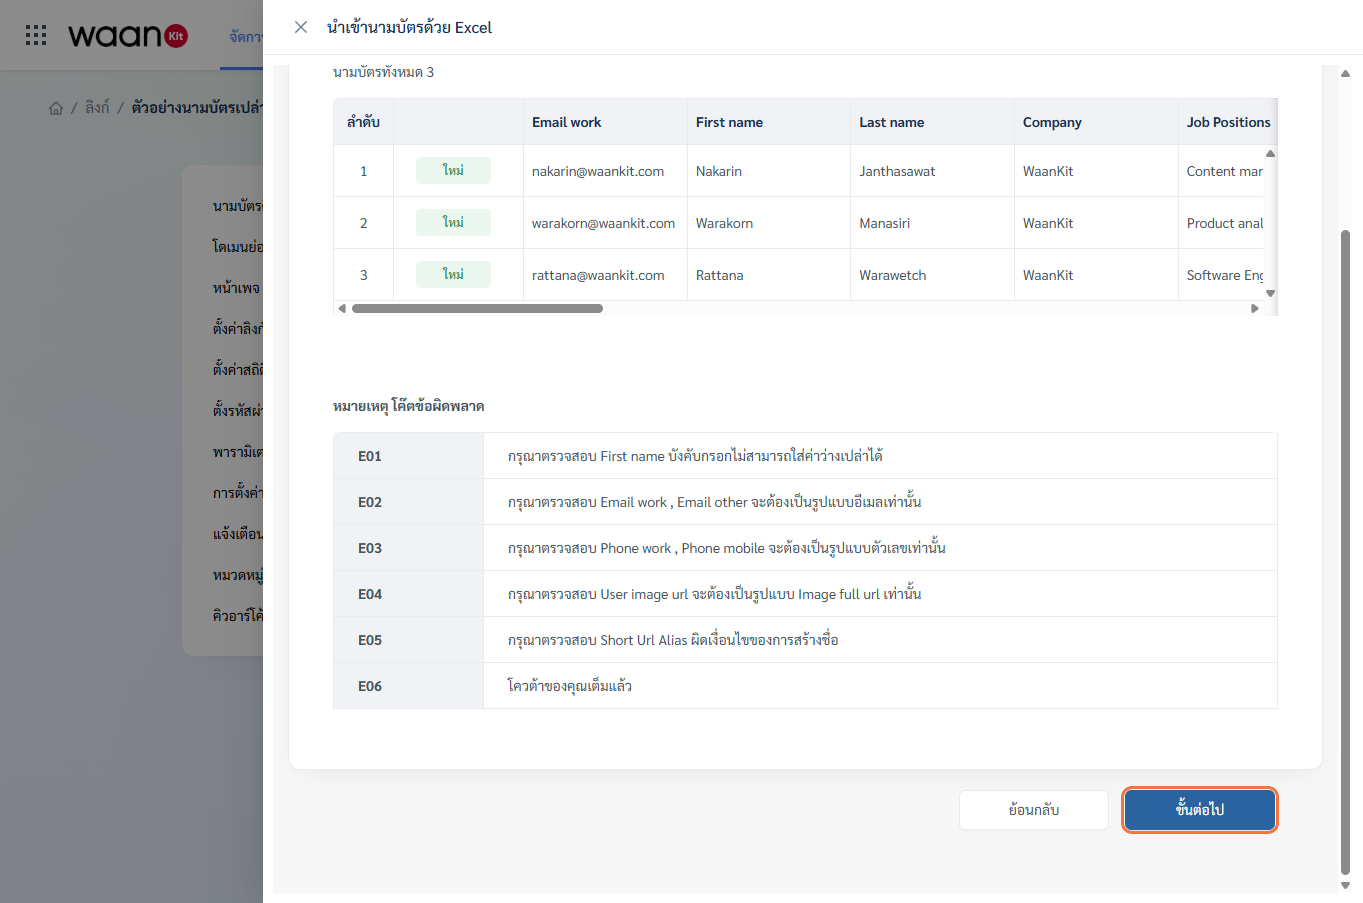
- The system validates all records and flags any formatting errors:
E01: Missing required First NameE02: Invalid Email syntaxE03: Phone contains non-numeric charactersE04: Malformed avatar URLE05: Invalid Short URL Alias formatE06: Package quota limit reached
- Click "Next Step" to generate all employee cards instantly.
2.5 Batch Export & QR Archive
- Export .xlsx Data: Click
...> "Export .xlsx Data" to backup all employee directory information. - Download QR ZIP: Click
...> "Download QR ZIP" to download styled QR codes for the entire roster in a single ZIP package, formatted for employee badge printing and NFC hardware encoding.
2.6 Card Roster Table Actions
The card table displays all active employee profiles with quick-action toolbars:
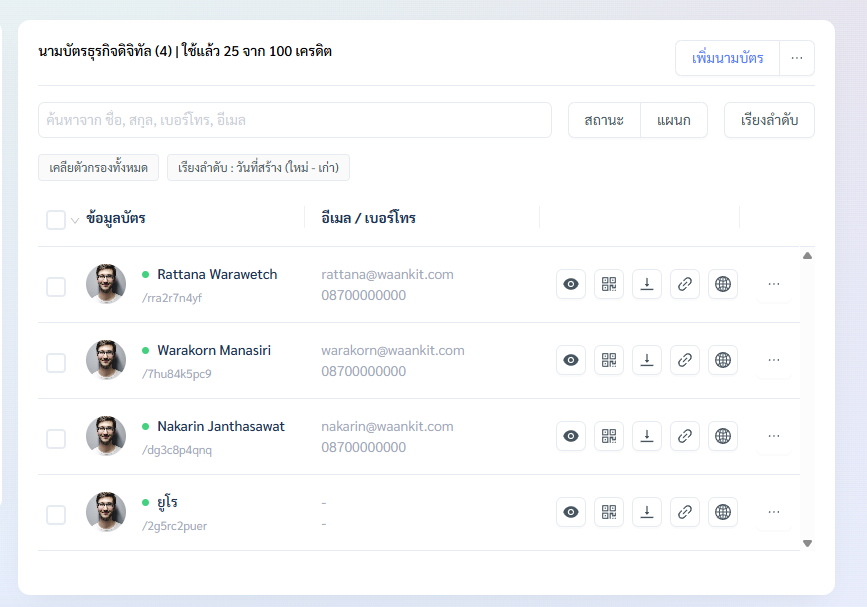
- Preview: Inspect the mobile view in an interactive smartphone frame.
- View QR Code: Open a high-resolution QR modal for testing.
- Download QR: Save an individual employee's QR image.
- Copy Link: Copy the direct profile URL to clipboard.
- Open Web: Open the live public business card in a new browser tab.
- Action Menu
...:
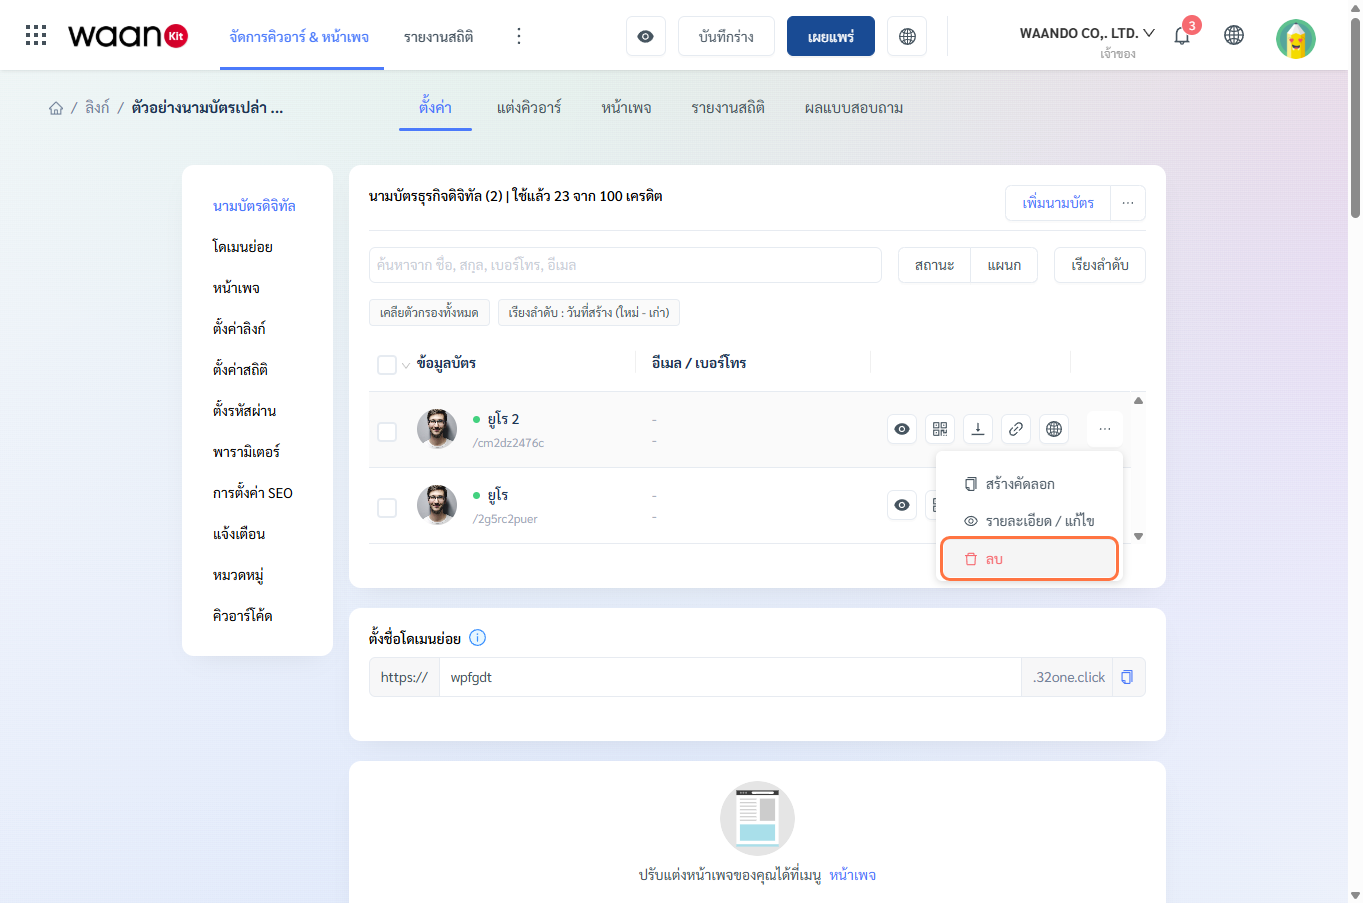
- Duplicate: Clone existing contact details to onboard a new employee rapidly.
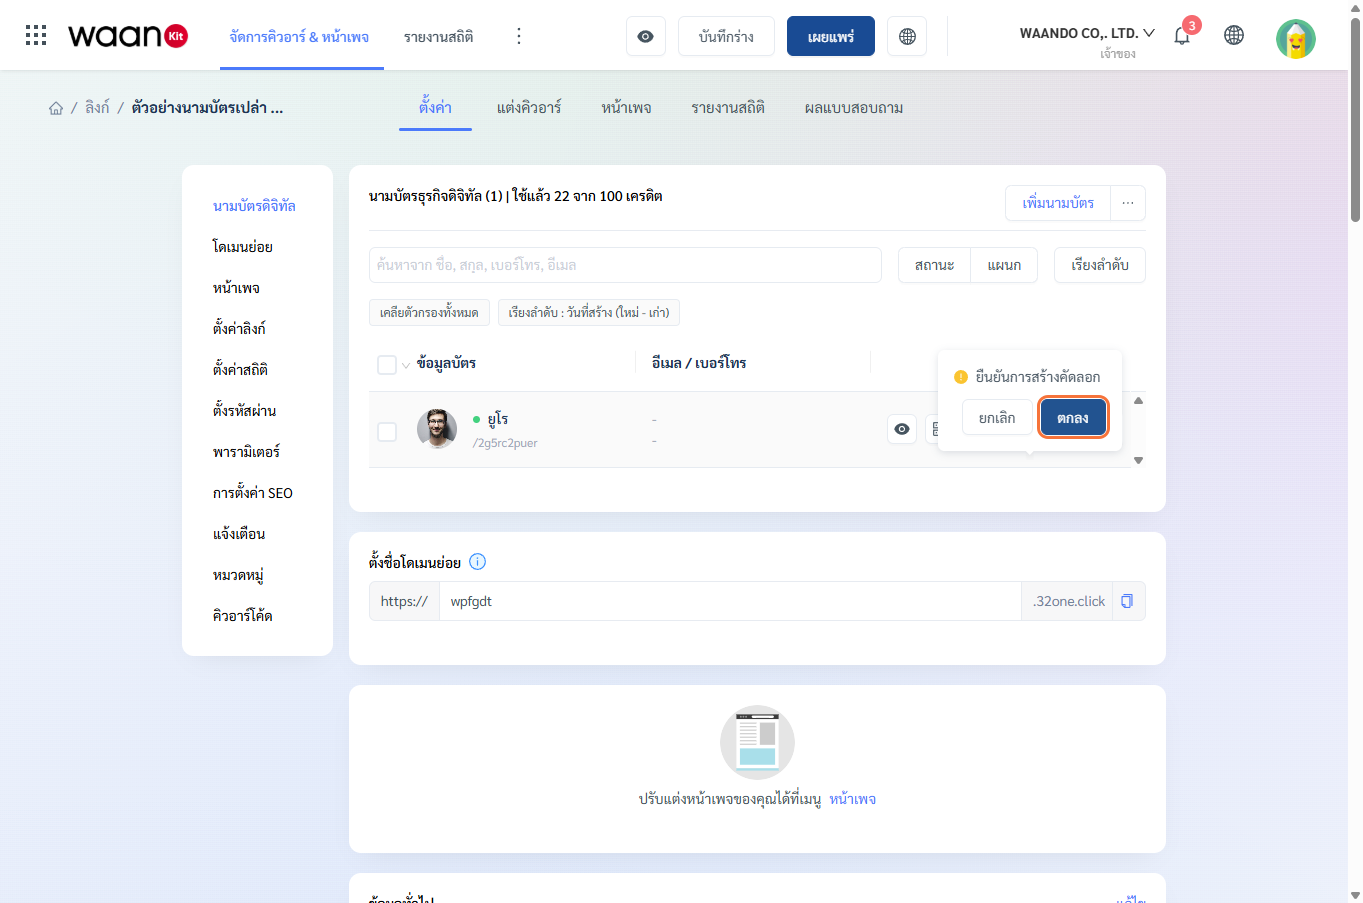
- Details / Edit: Open the drawer to modify profile info, titles, or contact info.
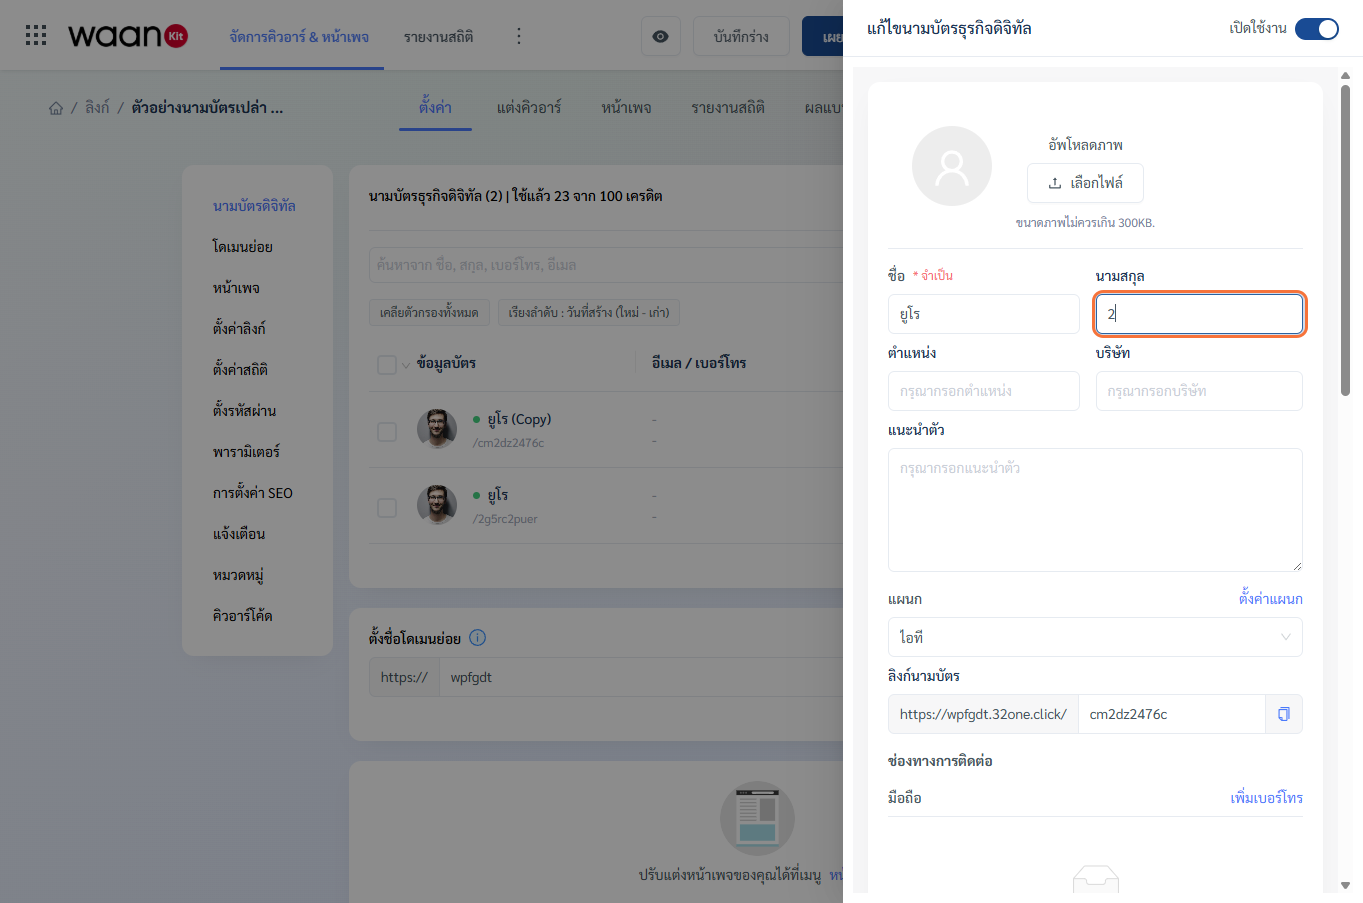
- Delete: Remove the card and immediately reclaim its quota credit.
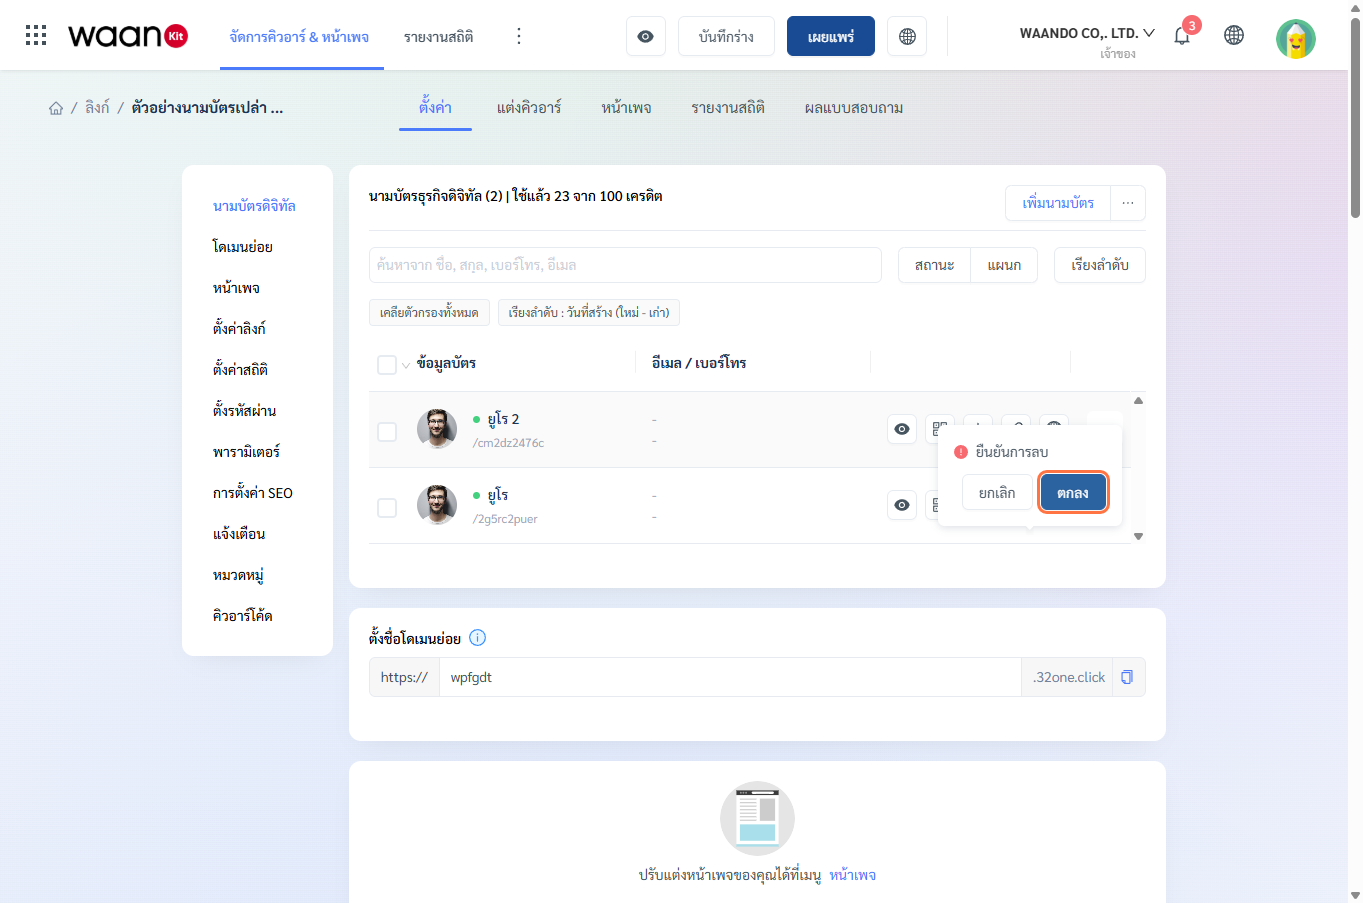
3. Shared Group Settings
Group-level settings share standard configuration modules with Landing Pages and Dynamic QR Codes. Refer to the corresponding documentation links below:
[!NOTE] Landing Page Shared Settings:
- Subdomain Configuration: Set a dedicated custom subdomain for the group (e.g.,
https://sales-team.waando.com) (Read Guide)- Page Builder: Open the visual builder to customize themes, color styles, and layout blocks (Read Guide)
- SEO & Social Share: Configure meta tags, titles, and Open Graph share previews (Read Guide)
- Form Inquiry Alerts: Receive real-time lead submissions via LINE Notify or Telegram bot (Read Guide)
[!TIP] Dynamic QR Code Shared Settings:
- Link Settings: General metadata, status toggle, and activation schedules (Read Guide)
- Tracking Analytics: Embed Facebook Pixel, GA4, and TikTok Pixel IDs (Read Guide)
- Password Protection: Lock the business card group behind a PIN passcode (Read Guide)
- Custom Parameters: Add dynamic query parameters for source tracking (Read Guide)
- Category & Branch Locations: Group business cards by branch locations (Read Guide)
- QR Styling Studio: Customize frame designs, dot patterns, and corporate logos (Read Guide)