

Personal Profile & Time Zone Configuration
The Profile Settings page (/app/profile/edit-profile) serves as the central hub for managing your personal account details, including your profile avatar, primary login email, personal contact information, and workspace time zone.
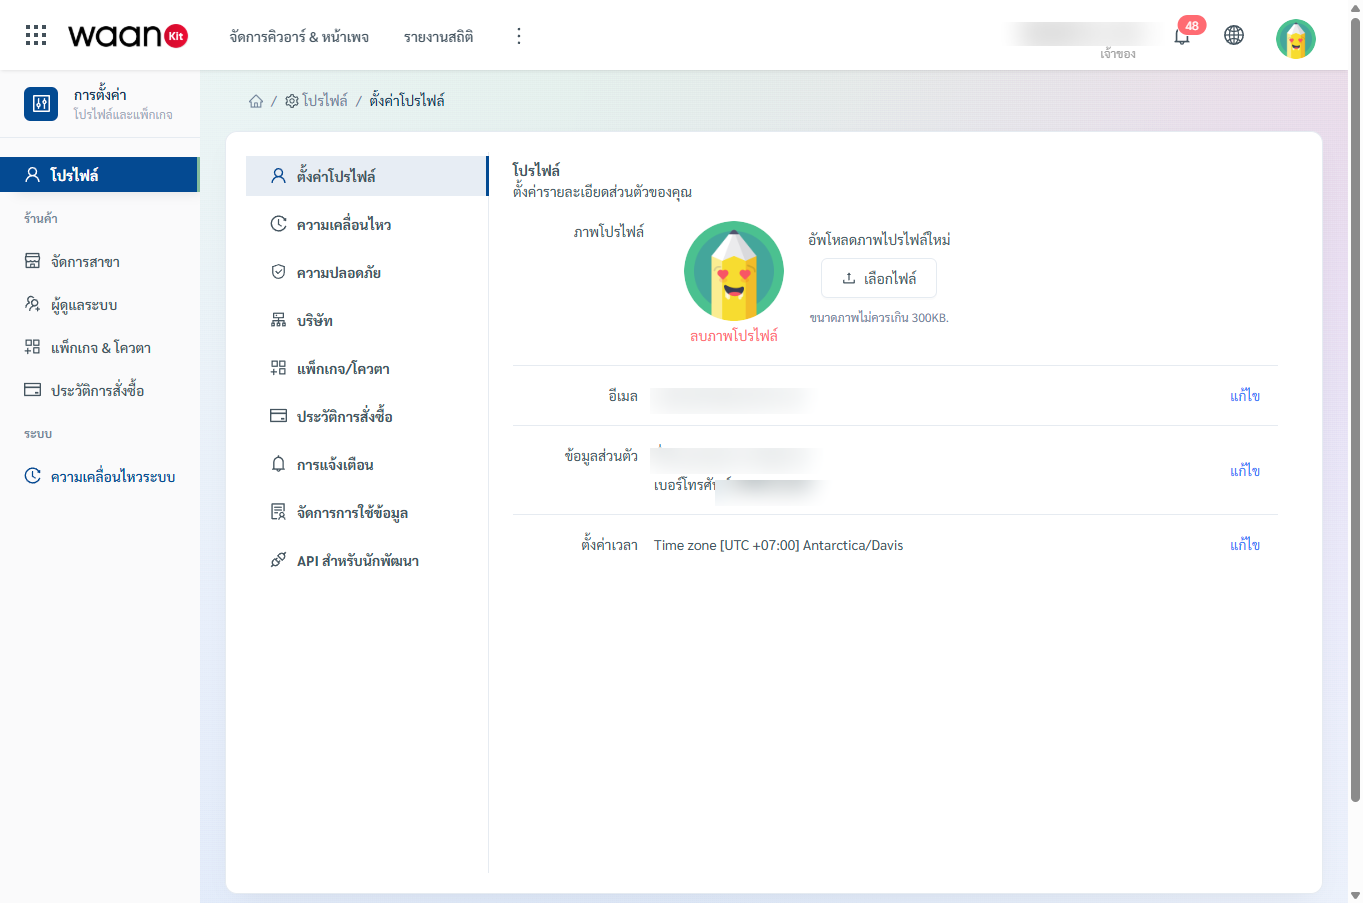
Accessing Profile Settings
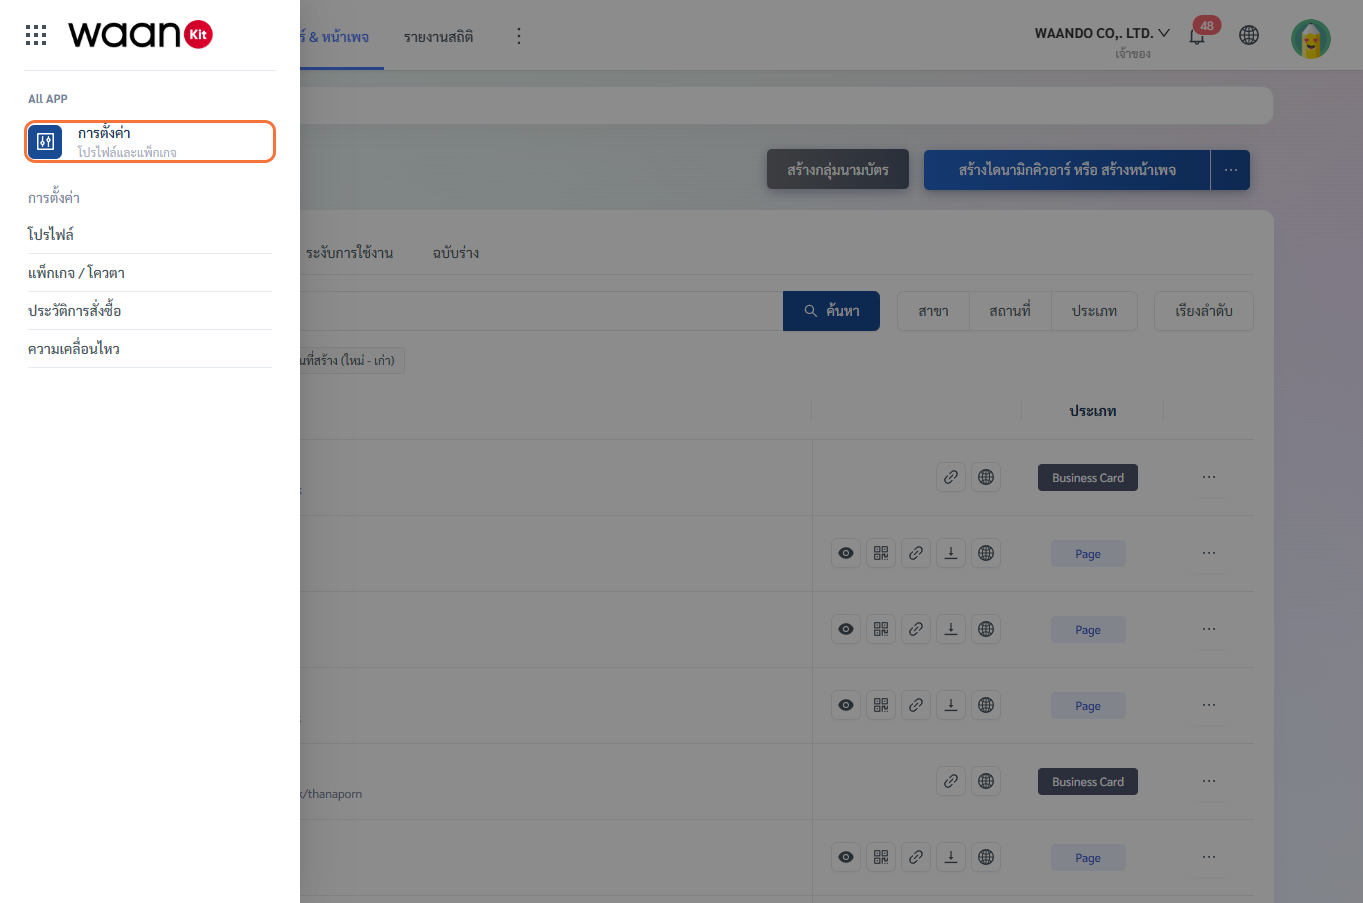
You can access the Profile Settings page via two methods:
- Via the Main Sidebar: Navigate to "Settings / Profile & Packages" > select "Profile Settings".
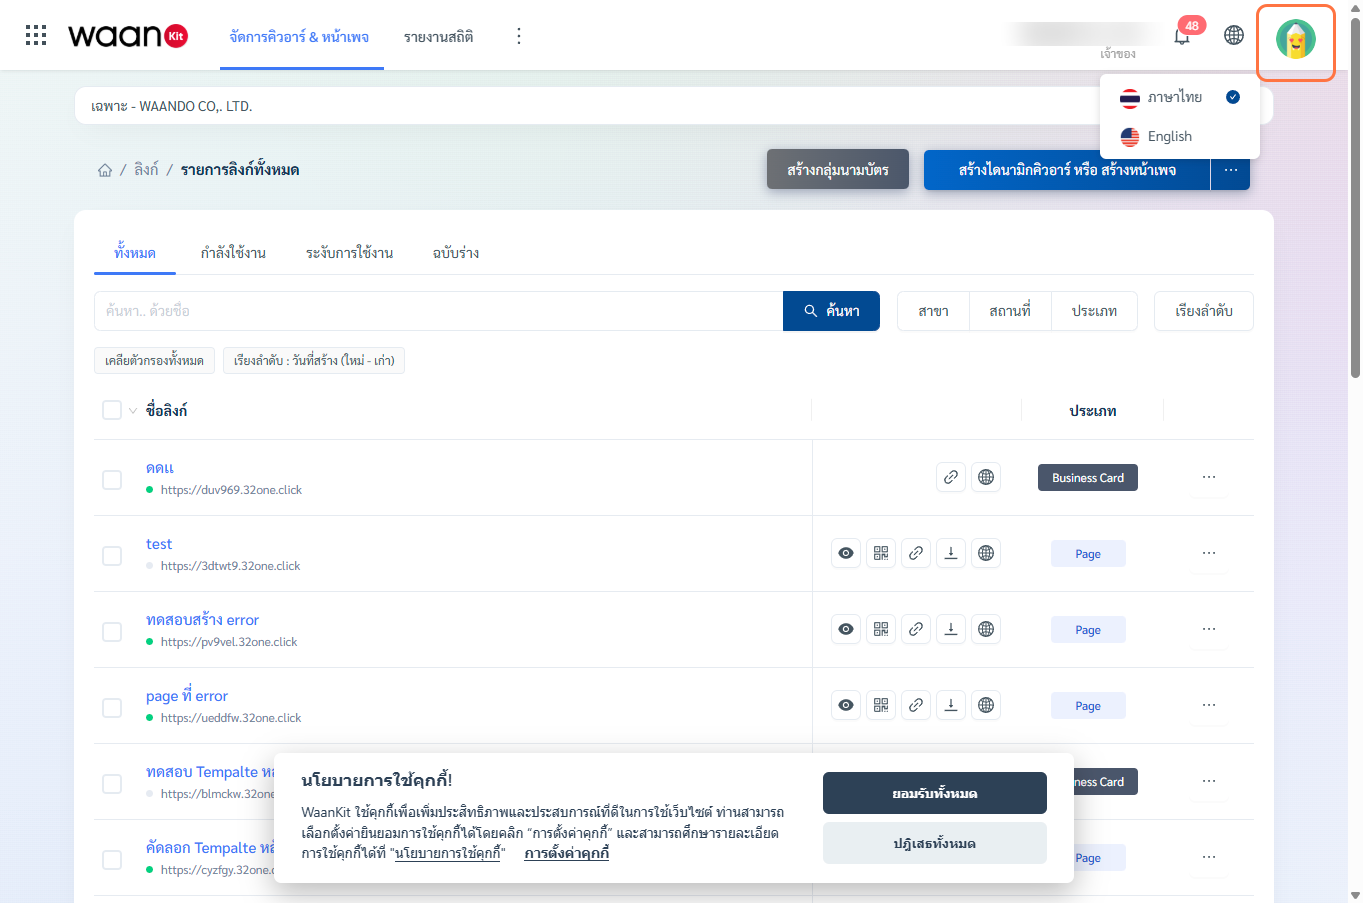
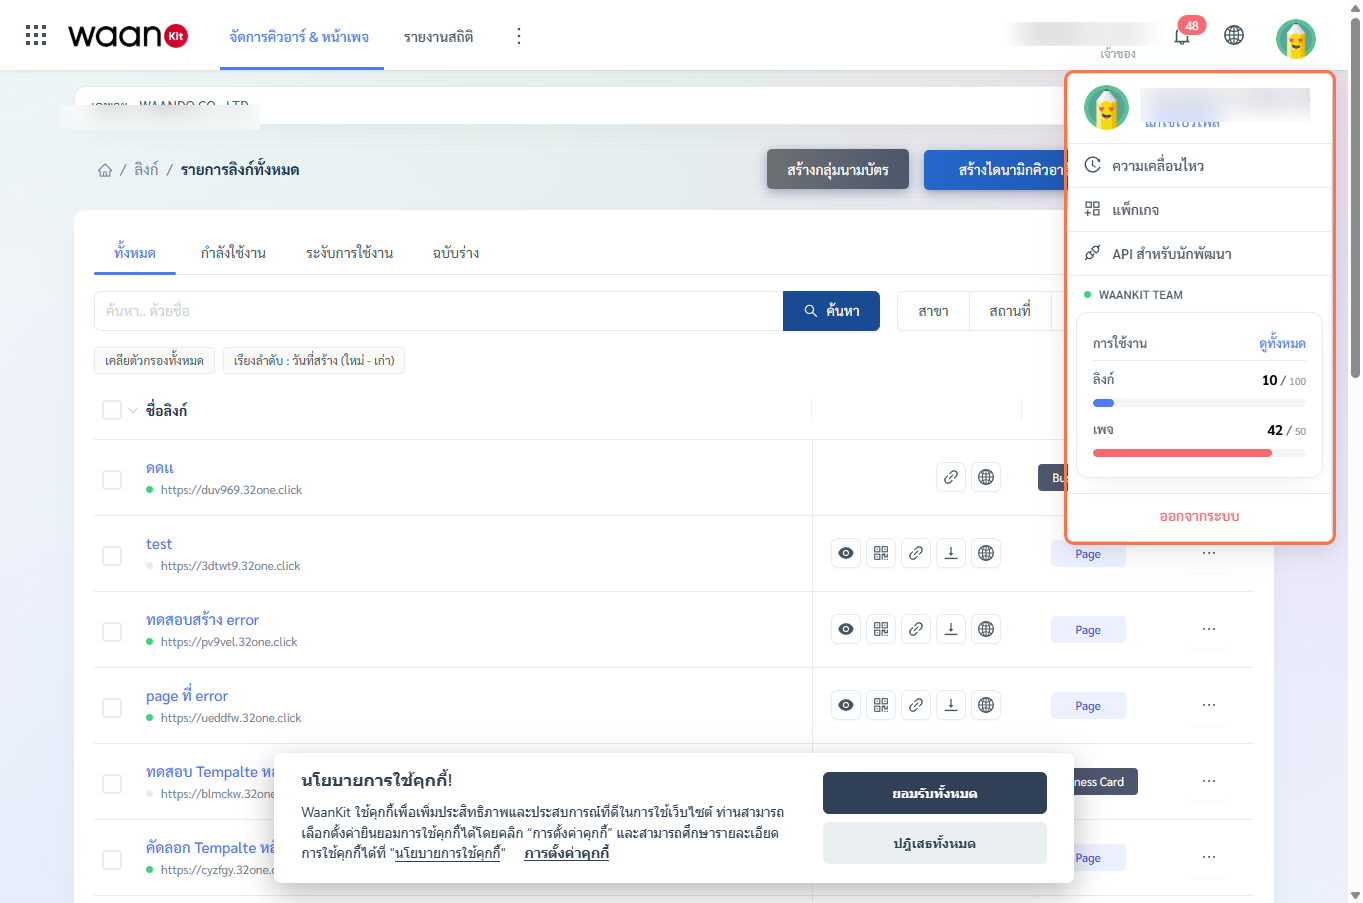
- Via the Top-Right User Menu: Click your Profile Avatar / Username in the top-right header, then select "Edit Profile".
1. Managing Your Profile Avatar
Your profile avatar appears in the top navigation header, staff management directory, and security movement logs.
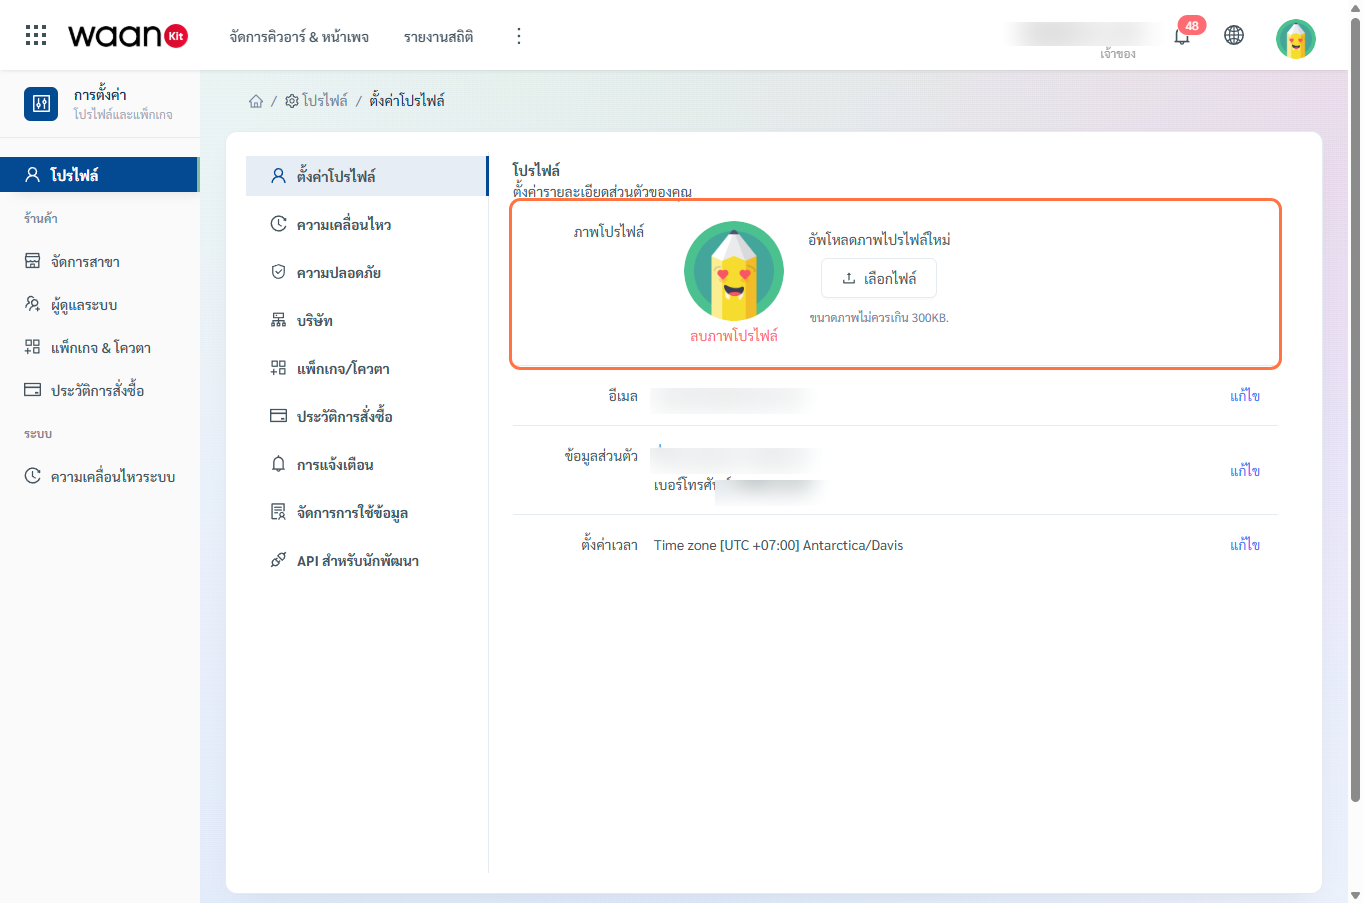
Steps to Upload a New Avatar:
- Click the "Choose File" button under the profile picture section.
- Select an image from your device (
.jpg,.png, or.webpformat, maximum file size 300KB - 5MB). - A side drawer will open with image cropping tools:
- Use the Zoom Slider to adjust scale.
- Use the Rotate button to rotate the photo to your desired angle.
- Click "Save Profile Picture".
- Removing an Avatar: To revert to the default placeholder avatar, click the red "Delete Profile Picture" link.
2. Updating Primary Email with OTP Verification
Your primary email is used for logging into WaanKit and receiving important security alerts. To change your email:
- In the "Email" row, click the "Edit" button on the right.
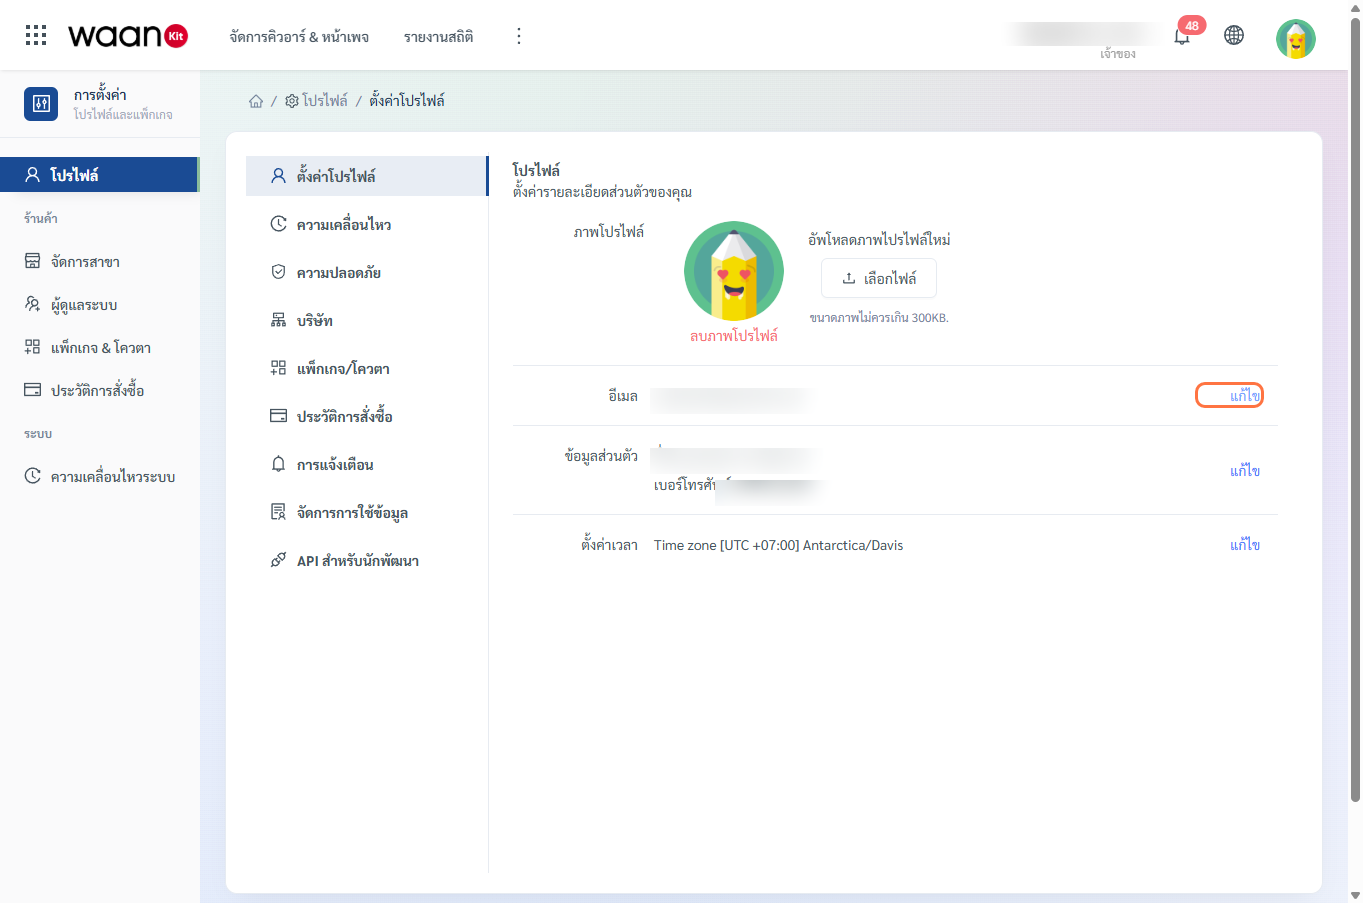
- The "Edit Email" side drawer will slide in.
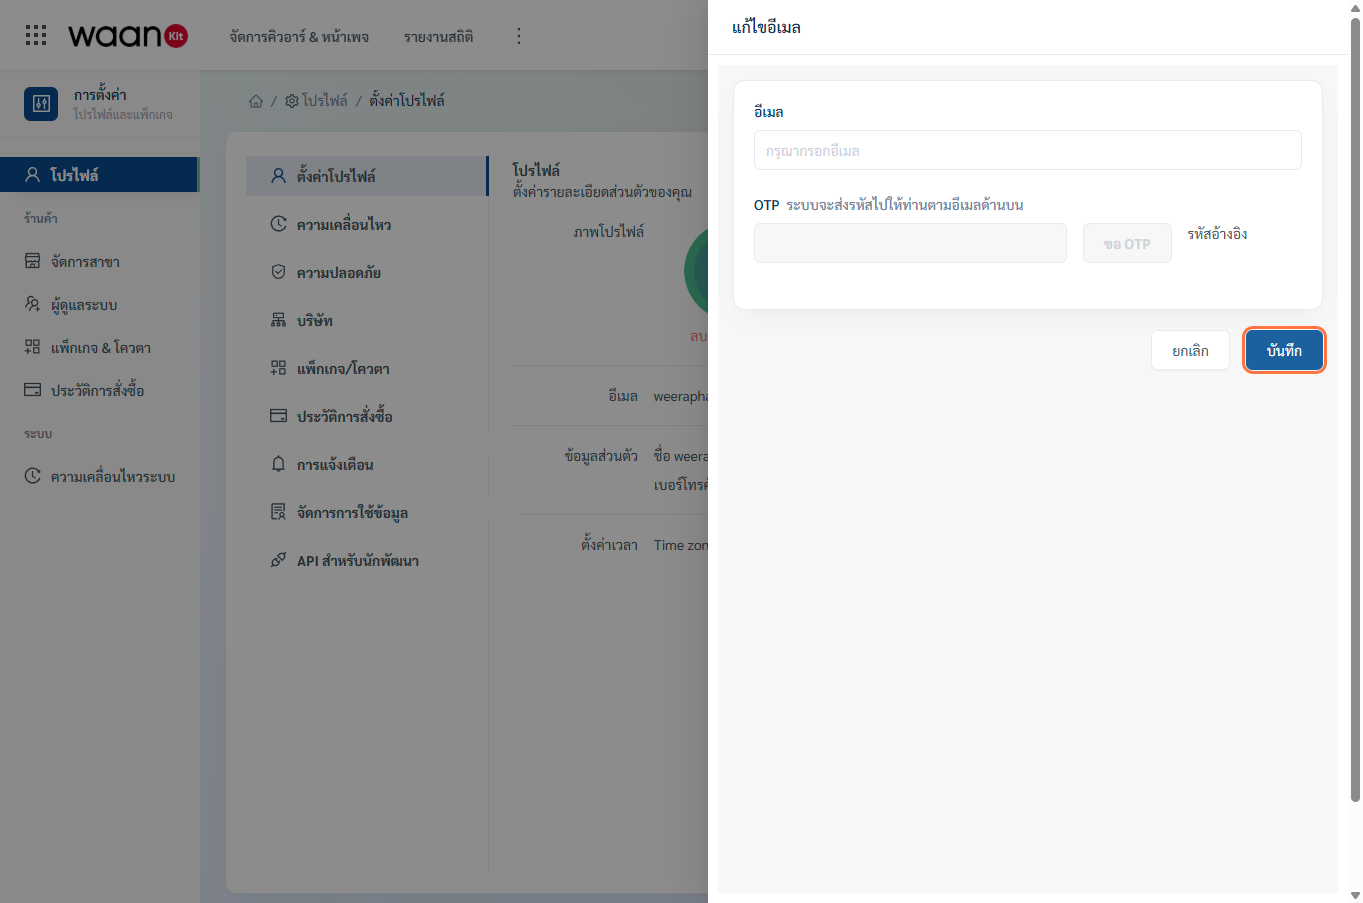
- Enter New Email: Type your new email address.
- Request OTP:
- Click the "Request OTP" button.
- A 6-digit numerical verification code will be sent to your new email along with a Reference Code (Ref Code).
- Enter OTP Code: Type the 6-digit code received into the OTP field.
- Click "Save" to finalize the email change.
[!IMPORTANT] Next Sign-in Requirement: After successfully updating your primary email, you must use the new email address for all future logins.
3. Updating Personal Contact Information
- In the "Personal Info" row, click the "Edit" button.
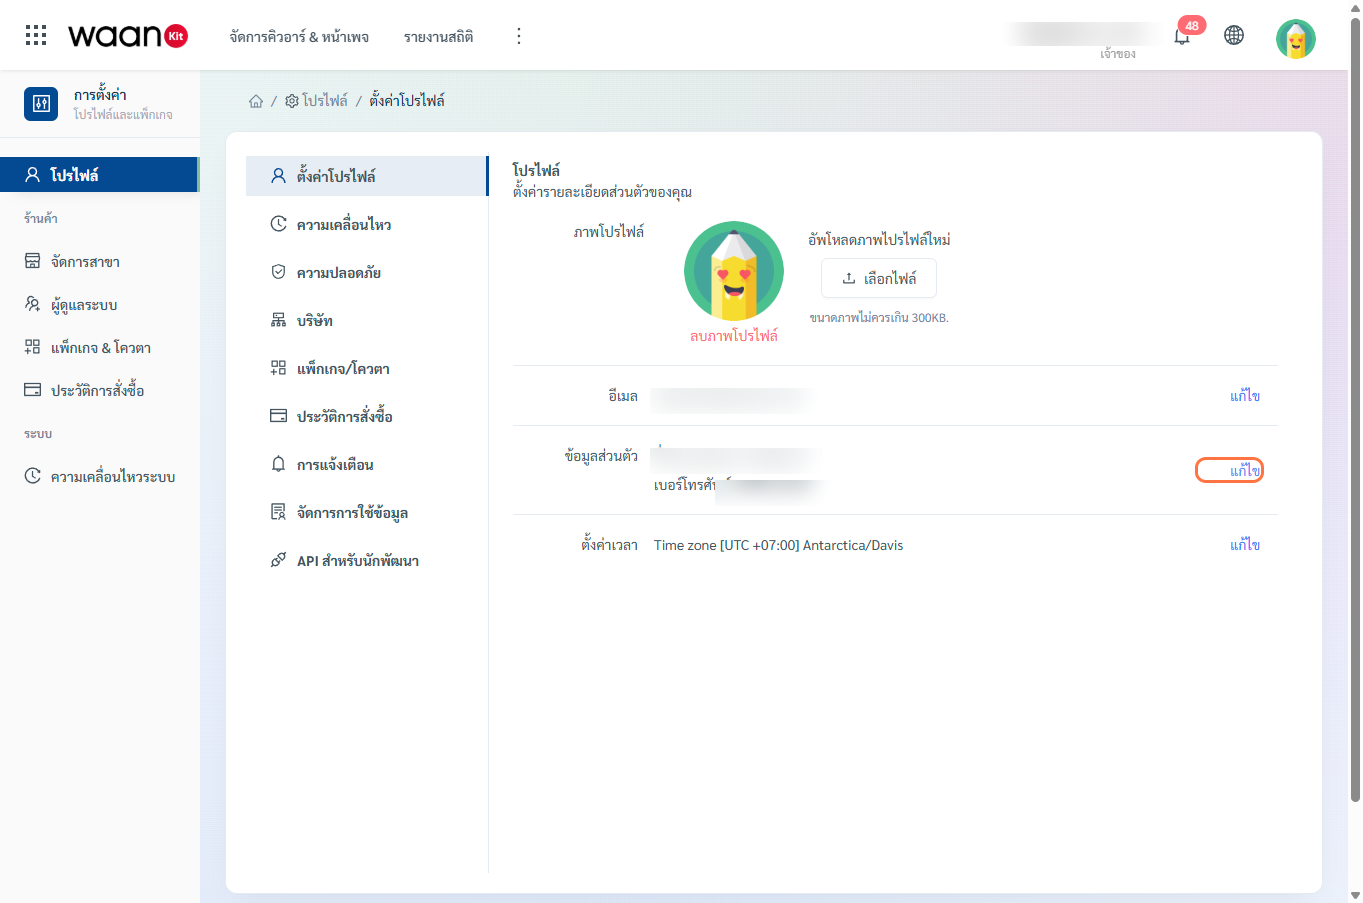
- The "Edit Personal Info" side drawer will appear.
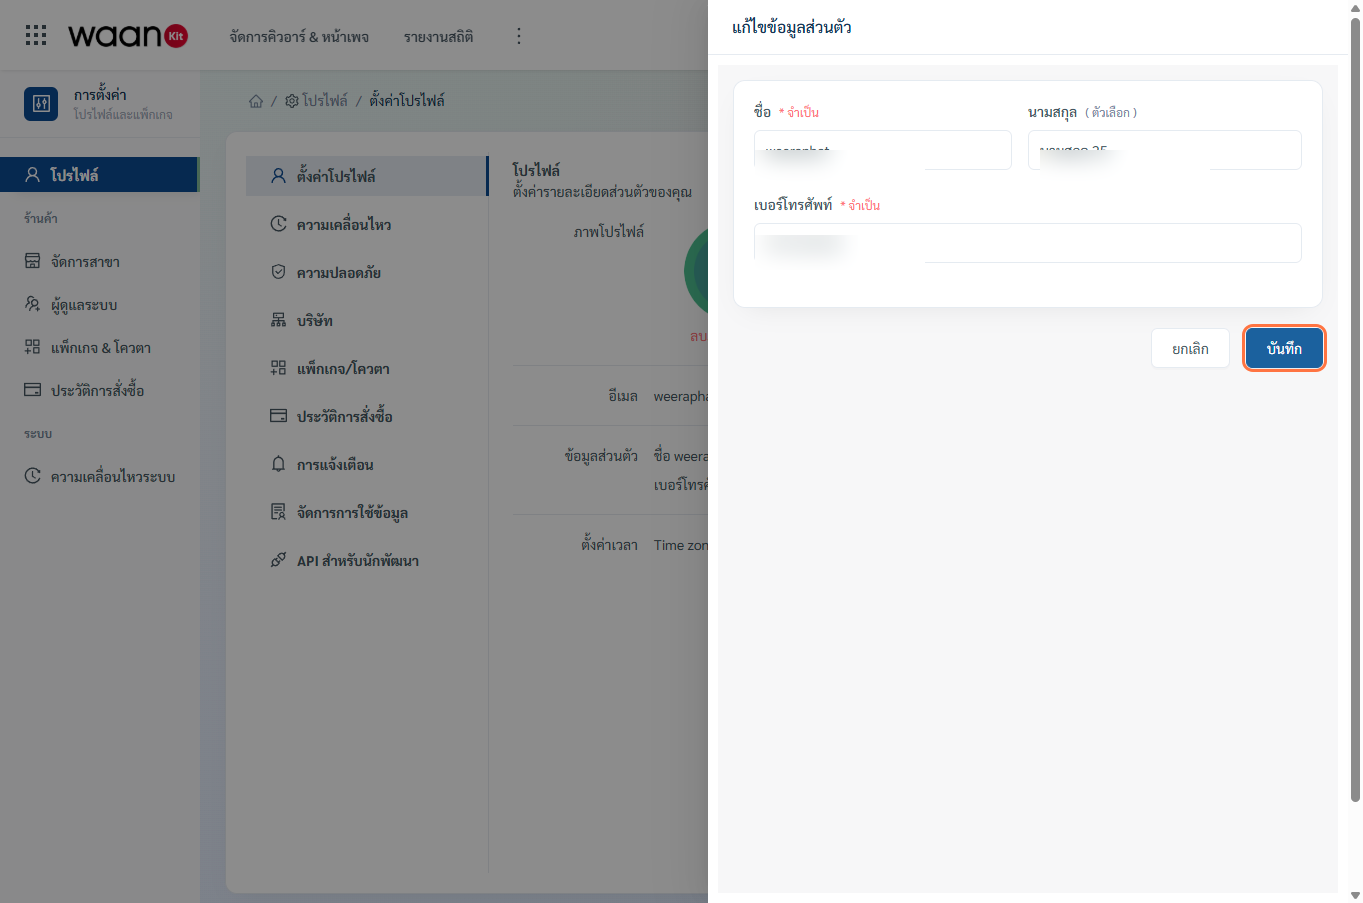
- Update your details:
- First Name: (Required) User's real name.
- Last Name: User's surname.
- Phone Number: (Required) Contact phone number for critical account alerts.
- Click "Save".
4. Configuring Time Zone
Setting the correct time zone ensures that QR scan analytics, landing page traffic charts, and activity logs reflect your accurate local time.
- In the "Time Zone" row, click the "Edit" button.
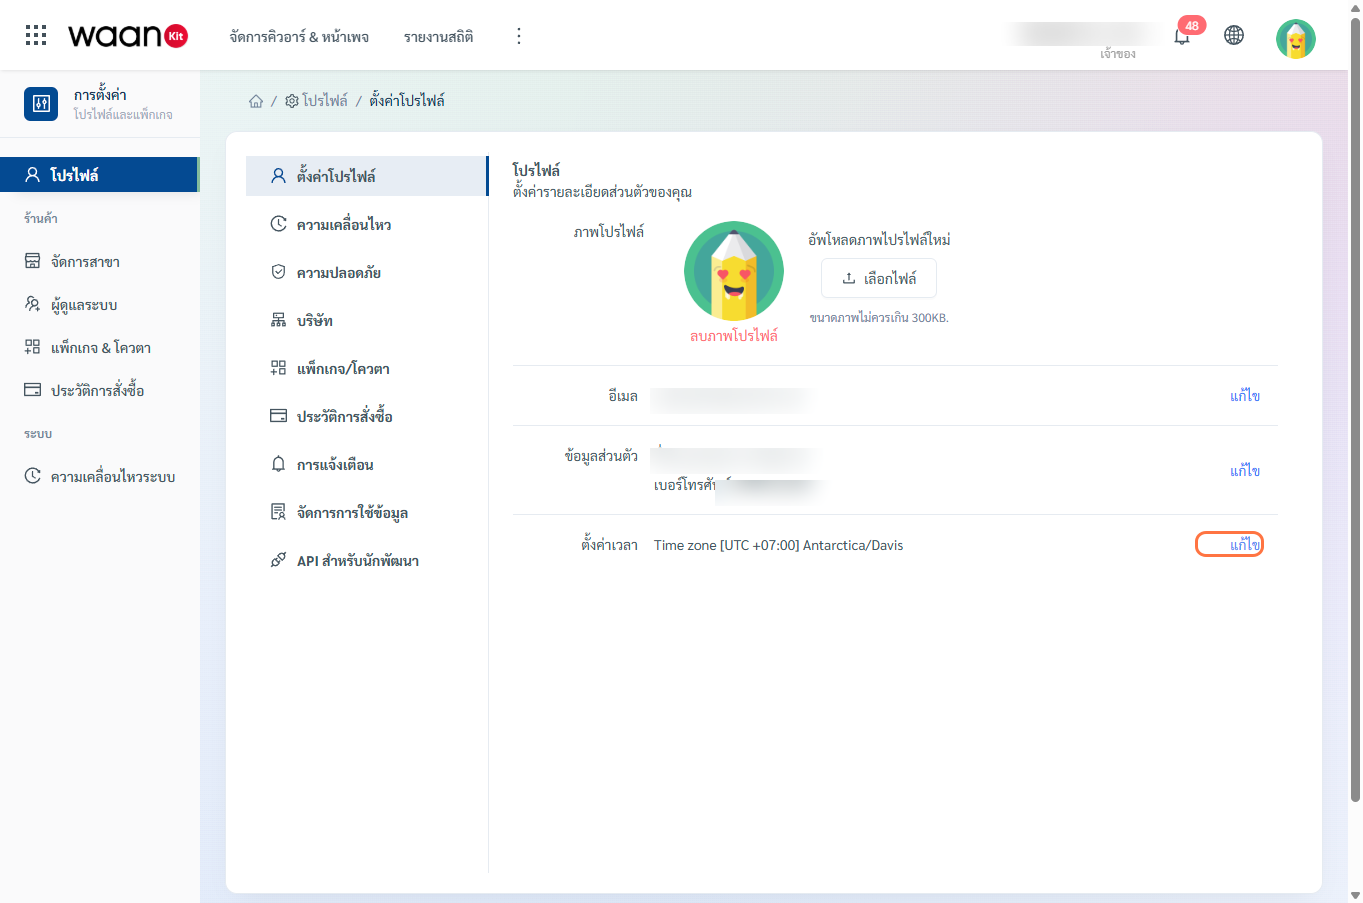
- The "Time Zone" side drawer will appear.
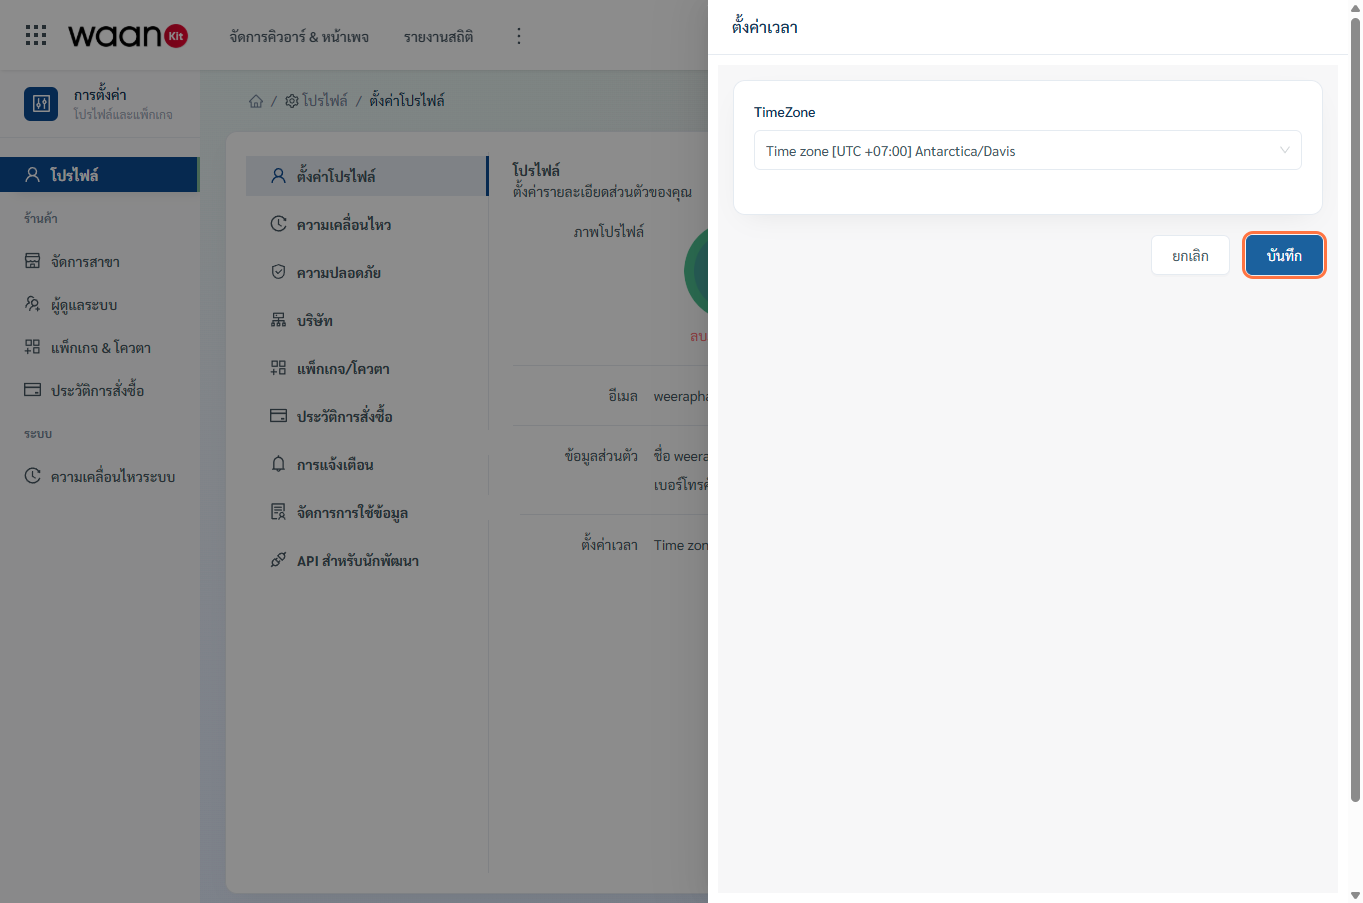
- Select your time zone from the dropdown (e.g.,
Asia/Bangkok [UTC +07:00]). - Click "Save" to apply the time zone across the entire platform immediately.